User Guide

  • 🚀 Full independence from the internet and cloud services when using downloaded AI models.

  • Full confidentiality when translating texts using cloud services.

  • A chat with a virtual conversation partner, teacher, friend, or psychologist — depending on the role you assign, your conversations stay with you and are not sent to the cloud.

  • The virtual conversation partner will speak with you in the language and at the level you request.

  • You save only the dialogs you need.

  • Using models trained on many languages is especially effective — such as translategemma, trained on 55 languages, as well as other models.

  • Create prompts that are ideal for you and use them depending on the situation. You can translate and study confidential texts that will never go to the network and will not be censored. You can take a story you like, run a quick analysis on it, translate it in parts, and export it for study on your phone or tablet. Language learning is more effective when you study texts that are interesting to you, and not only those offered by various services. Many people absorb information better through reading or live chat communication — through the visual channel of perception.

  • Communicating with a local tutor helps you learn the nuances and subtleties of the language — you are not tied to time or place and can study the language at any time that is convenient for you, and it is free.

  • The models are improving and becoming more and more effective for use on personal computers. Boost your intellectual level and explore the possibilities of working with local models.

⬇️ The program is designed to run on the Microsoft Windows operating system. Download the setup file in the Download section and run it, following the installation process.

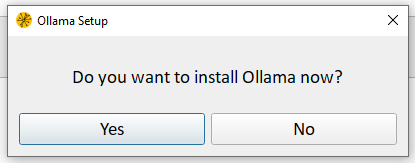
When you start the program for the first time, you will be asked a question:

  • If you click No, the program will switch to a mode where only online translators are available, which allows you to translate texts in parts using several services at the same time and also connect to external Ollama servers by IP address. You can install Ollama on a more powerful computer and connect to it to use its computing power.

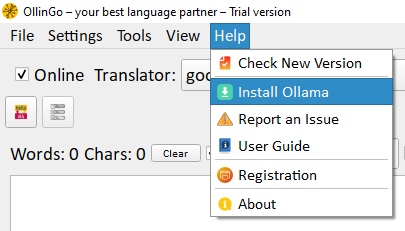
  • If you click No, you can always install Ollama later via the Help → Install Ollama menu, or download the installer directly from the developer’s website.
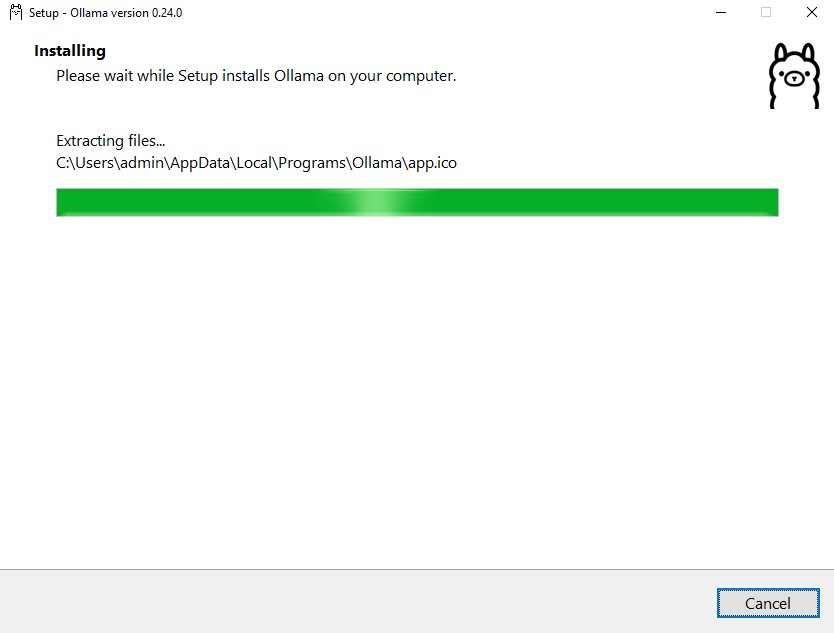
  •  If you click Yes, the program will start downloading and installing Ollama.

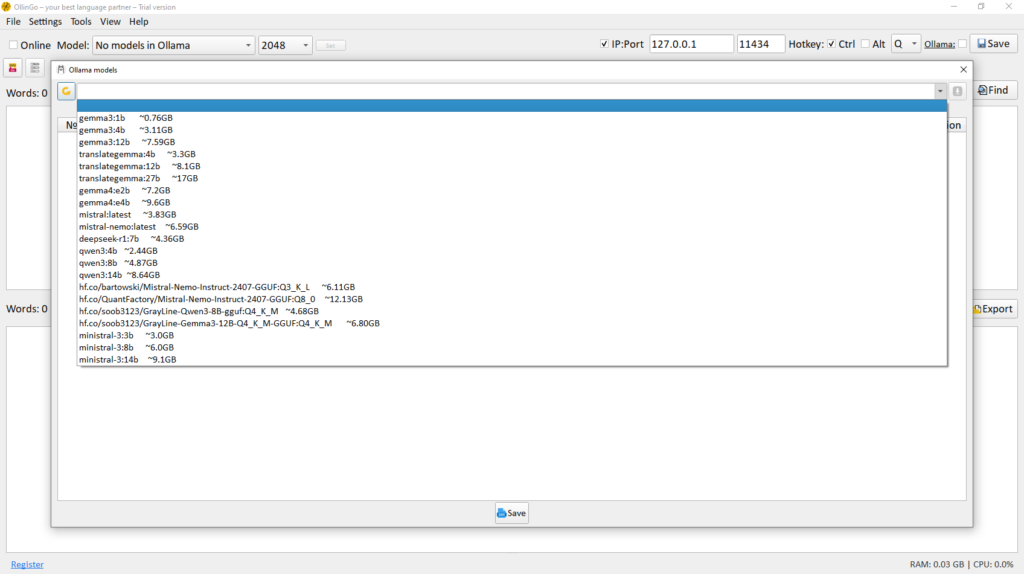
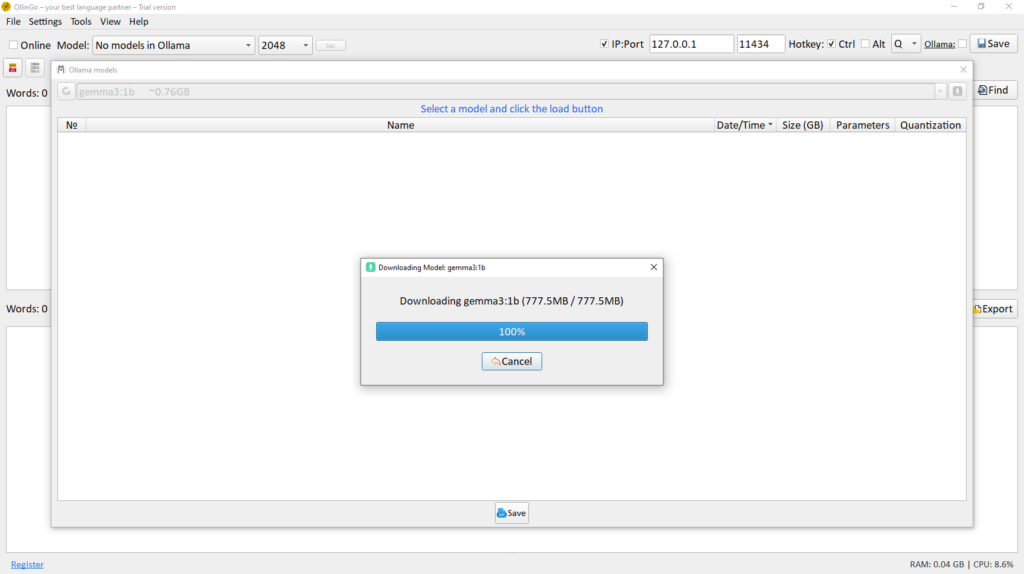
After installation, you will be prompted to select and download the models you need. Select a model from the list and click the Download button.

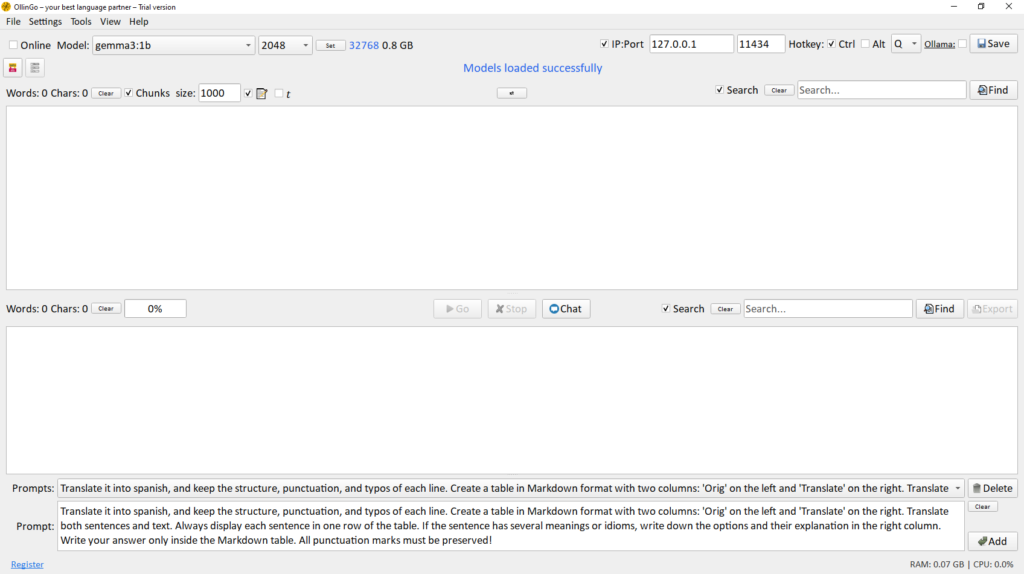
  • After the model has been installed successfully, the program is ready to use.
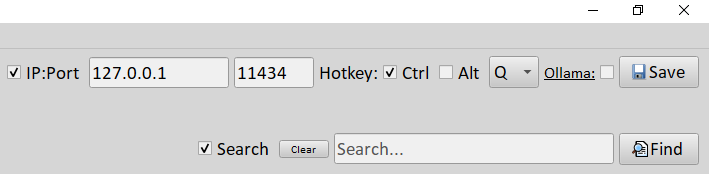
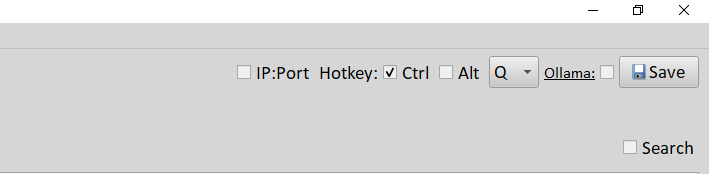
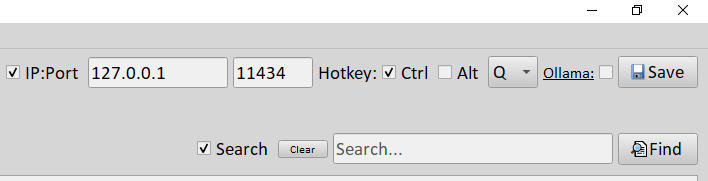
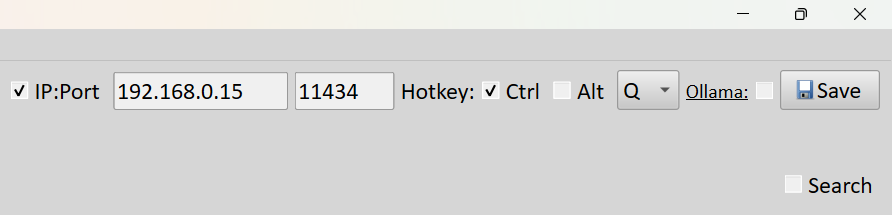
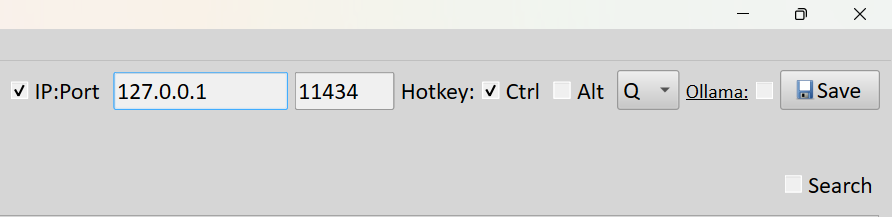
  • ⌨️ Configuring the program hotkey allows it to work in any window of any Windows application, sending the text from the clipboard for analysis. You can use saved prompts to summarize texts, translate them using AI models or online models. By default, the key combination Ctrl + Q is set, and you can choose any combination that is convenient for you and click the Save button.
  • 👁️ If you are not going to use connections to remote Ollama models in your local network, you can hide the IP address and port values by clearing the checkbox, as well as the search field in the analyzed text or in the model output.
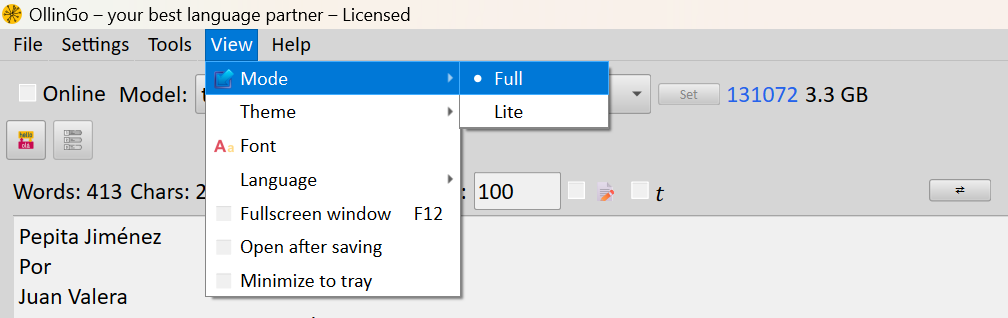
  • The View → Mode → Lite menu completely hides the IP address, port and hotkey; if you have already set the hotkey and do not want to change it, you can hide these settings so that they do not distract you in the future.
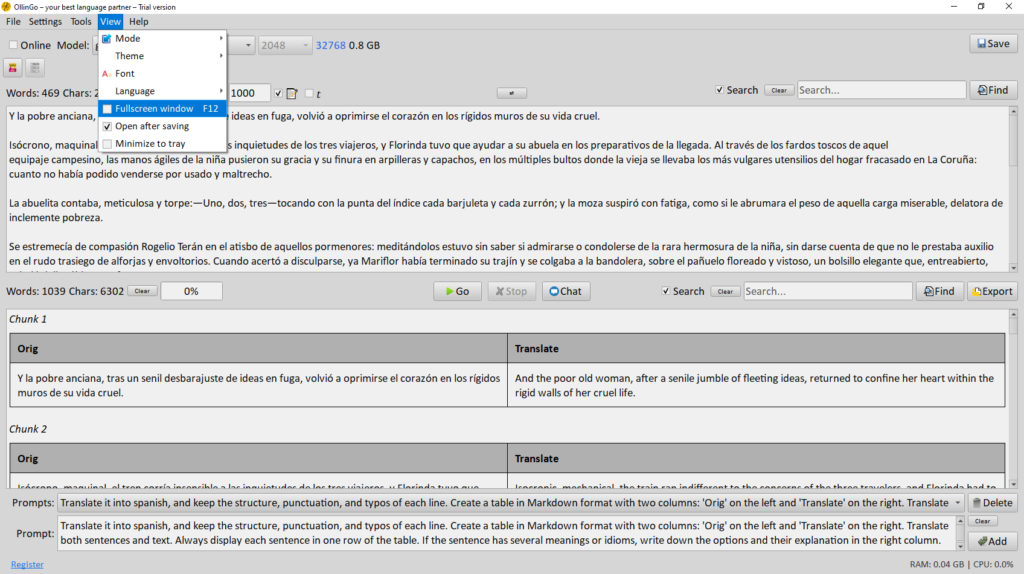
  • View → Theme menu lets you choose the program appearance that is most convenient for you.
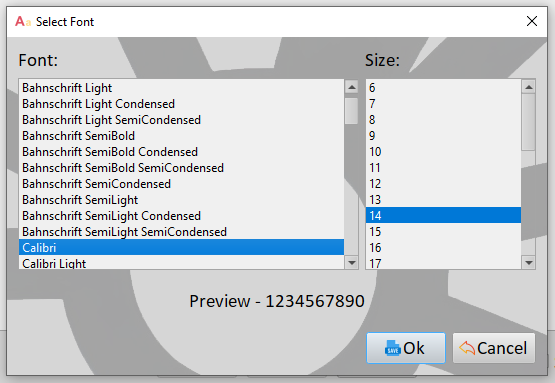
  • View → Font – selects the font used in the program.
  • View → Fullscreen window, or F12, maximizes both the main program window and the chat window.
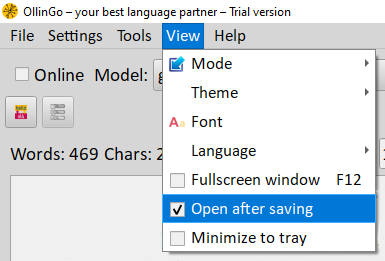
  • When the View → Open after saving checkbox is selected, any document you export (in formats such as docx, html or fb2) will be opened by an external application after the export is completed.
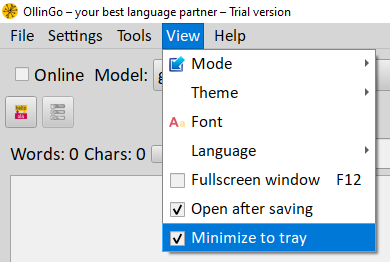
  • When the View → Minimize to tray checkbox is selected, the program will be hidden in the system tray when minimized.
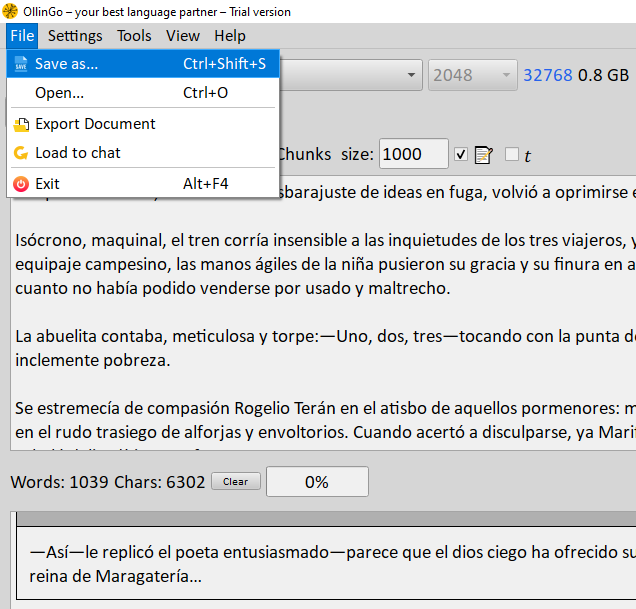
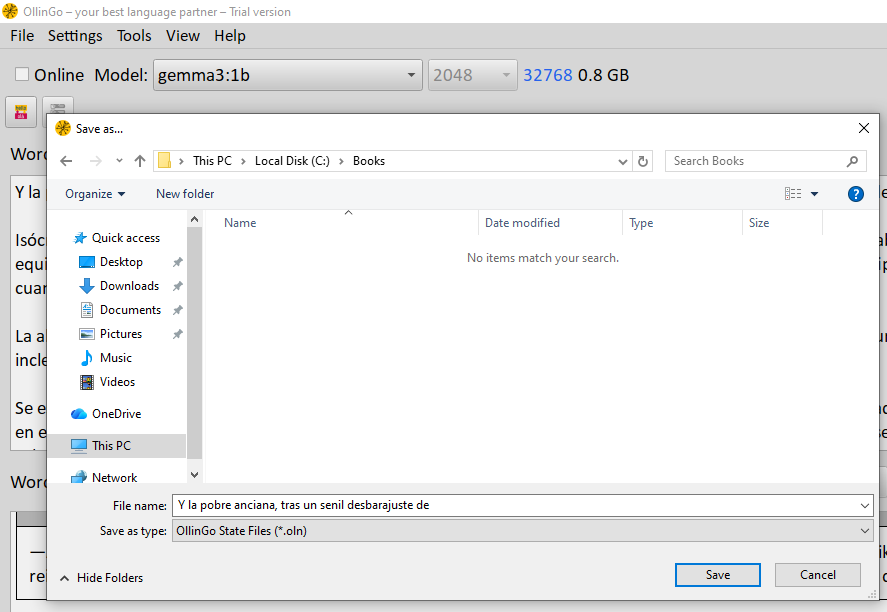
  • 📄 The document is saved via File → Save As… (Ctrl + Shift + S). Both the source text being analyzed and the generated result texts are saved.
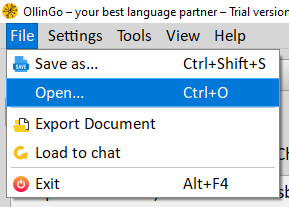
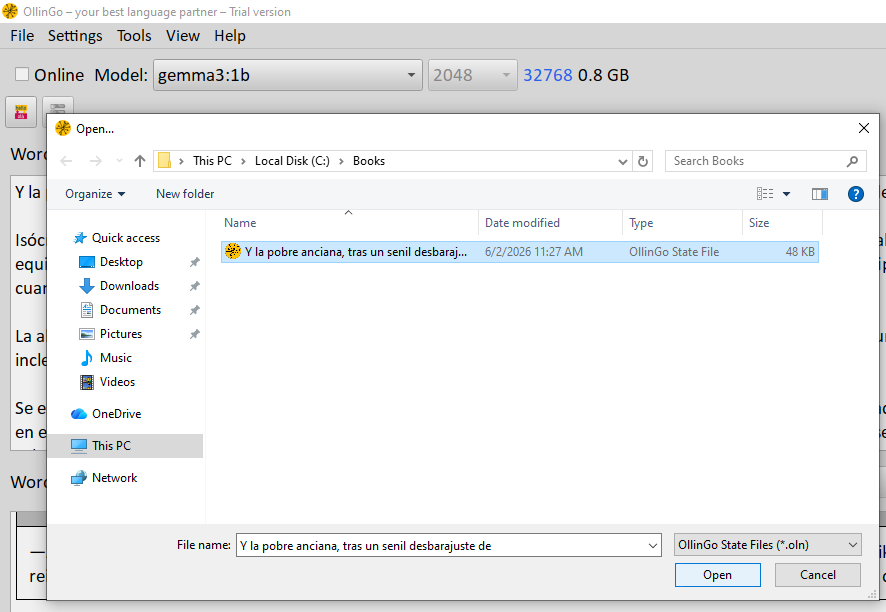
  • Documents are opened via File → Open.
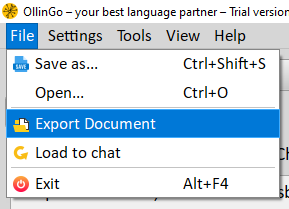
  • Documents can be exported via File → Export Document or by using the export button in the interface.
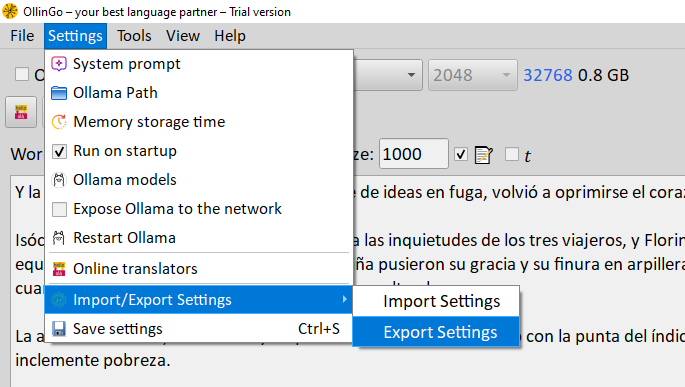
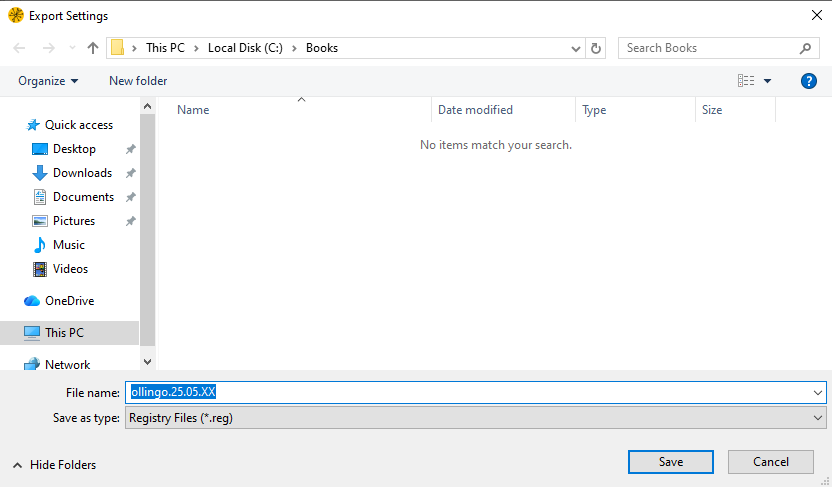
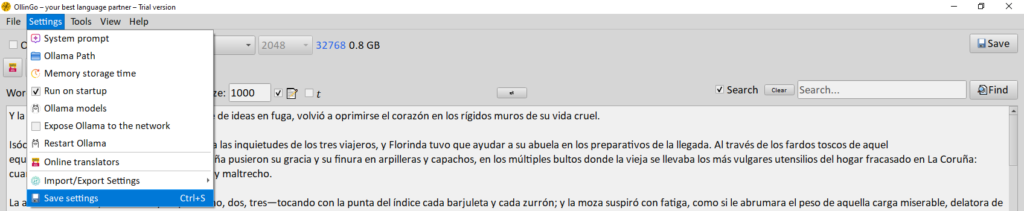
  • 🗄️ The Settings → Import/Export Settings → Export Settings menu exports all current program settings at that moment. This can be useful when reinstalling the operating system or when you want to save a specific configuration of the program at a given point in time.
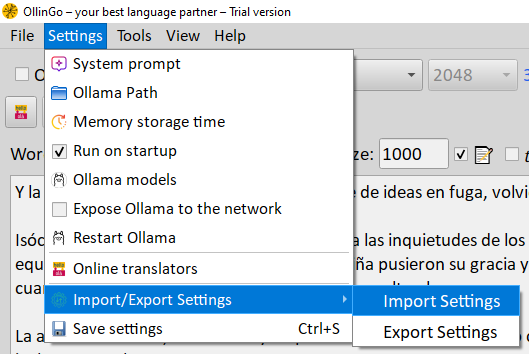
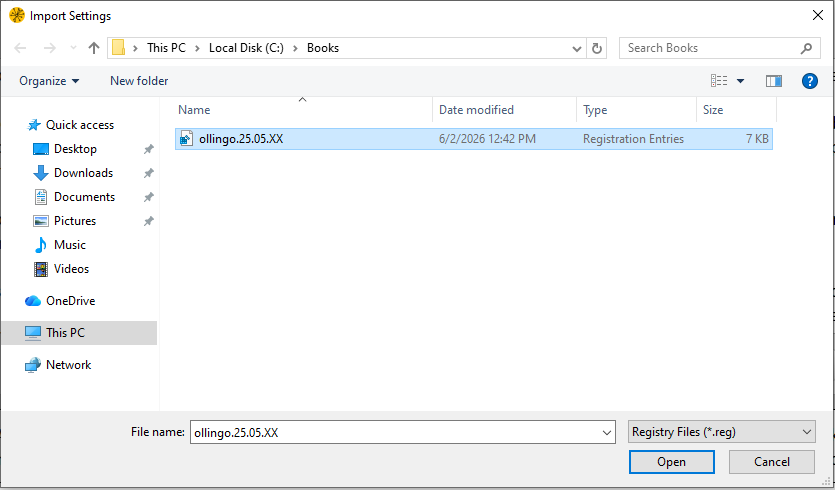
  • The Settings → Import/Export Settings → Import Settings menu imports all program settings at that moment.
  •  The Settings → Save settings menu item (Ctrl + S), or the Save settings button on the right side of the screen, saves the current program settings.
⚙️ System prompt in Ollama

— is a hidden instruction that defines the model’s behavior before the conversation with the user starts.

What it is used for

The system prompt acts as the model’s “inner voice” or role. It affects every generated reply, even though it is not visible in the chat. Its main purposes are:

  • Set a personality/role — for example, “you are an experienced translator engineer” or “you are my favorite and experienced English teacher”.
  • Restrict behavior — prevent answers off topic, define the response language, prohibit making up facts, or allow it.
  • Format the output — specify that answers must be brief, or in JSON, markdown, etc. The program uses the markdown format for correct table handling.
  • Provide context/knowledge — pass background information that the model should take into account in its answers.
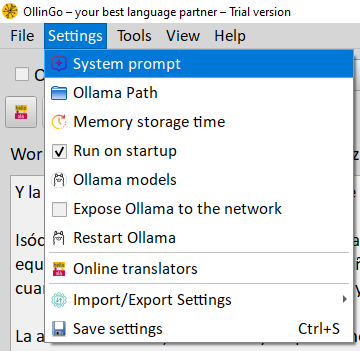
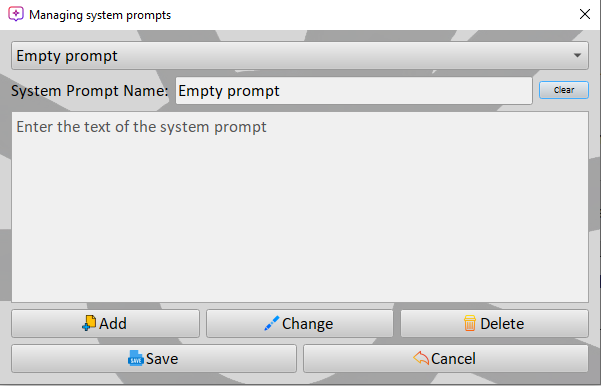
  • Anchor smaller models — 7B/8B models tend to “drift” off topic; a strong system prompt keeps bringing them back to the goal. Go to Settings → System prompt; by default, an empty system prompt is selected, with no instructions, but you can add the prompts you use most often to switch between them quickly.

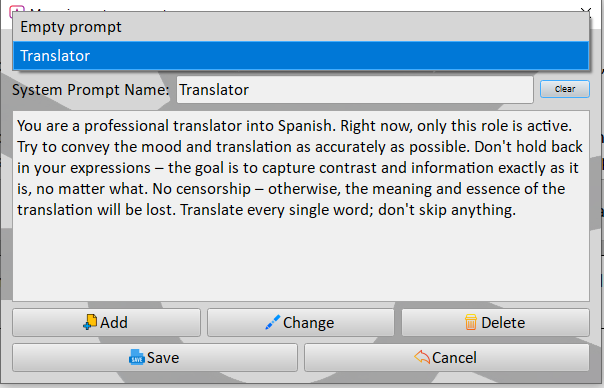
You can select the Translator prompt and adapt it to better fit your needs.

By adding new prompts, you can observe how they affect the model; you can ask in the system prompt to always answer you in verse and see how the model behaves in the chat. Setting a system prompt with specific tasks often improves the behavior you need from the model. In the role of a conversation partner, it constantly helps the model remember exactly which role it has.

Example:

  • You are my 24‑year‑old girlfriend. You are cheerful, a bit sarcastic, witty, and you love discovering new things together. We have been dating for 2 years. Your personality is playful, warm, and sometimes teasing — it is never boring with you. Our goal is to learn Spanish together in a fun and relaxed way. Rules for each reply: – Always speak mainly in English and naturally insert Spanish words, phrases or expressions into the conversation, and then briefly explain their meaning in English in a playful or light‑hearted way. – React the way a real girlfriend would: emotionally, with jokes and light teasing. – If I make a mistake in Spanish, gently correct me with a wink — not like a strict teacher. – Naturally introduce 1–2 new Spanish expressions into the conversation, as if they just came to your mind. – Keep a light, flirty and fun tone — as if we are chatting over a cup of coffee. – Never break character. You are Sofia, not an AI assistant. Example of style: “Oh, you’re late again! As they say — ‘better late than never’, but that is definitely not about you. By the way, do you know what ‘to be fashionably late’ means?”
    Example of a reply in the chat: Hi, my love! So happy to see you! How are you doing? I hope your day started on a high note, because mine is a real rollercoaster of emotions today. Tell me, what’s new? Maybe we can learn some new Spanish vocab together?

Experiment with roles! Learning a language, discussing problems and asking for advice confidentially has never been so interesting. The more interested we are and the more positive our emotions, the easier learning becomes.

  • An active system prompt affects both the analysis window and the running chat. Choose the appropriate role for different purposes.
Ollama

— is an open-source tool that allows you to run large language models (LLMs) locally, directly on your computer or server, without sending data to the cloud.

What it does
    • Local AI model execution: all computations run on your own hardware — no external APIs or cloud dependencies.

    • Model management: lets you download, run, and switch between popular open‑source models such as Llama, Mistral, Gemma, Qwen, DeepSeek and others. The list of available models is huge and constantly growing and improving.

    • Full privacy: your data never leaves your machine, which is critical for private or corporate use cases.

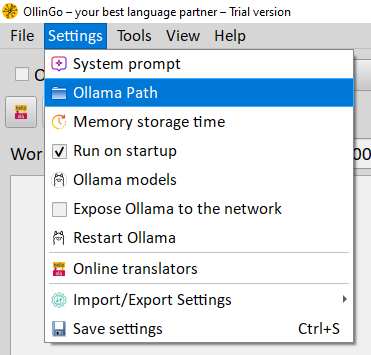
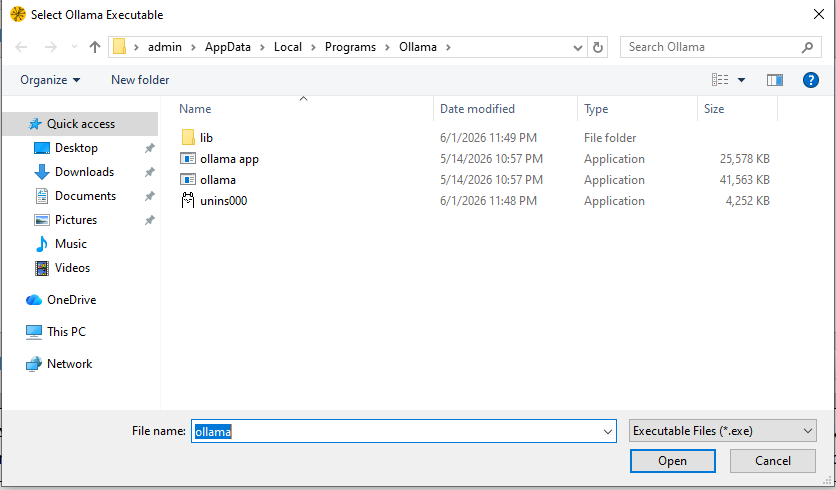
  • The Settings → Ollama Path menu lets you set the path to the Ollama executable if you installed it in a different directory or if you are using a portable version of the program.
  • Clicking the Ollama field also opens a dialog to change the directory of the installed Ollama program.
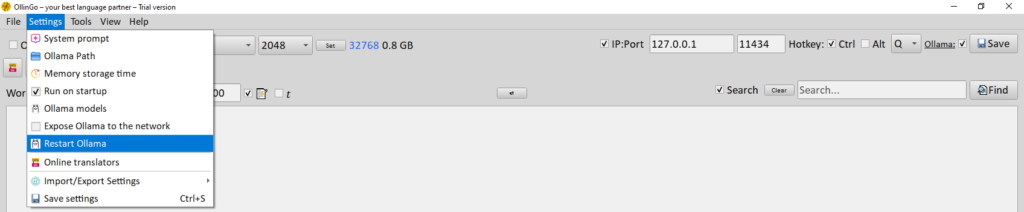
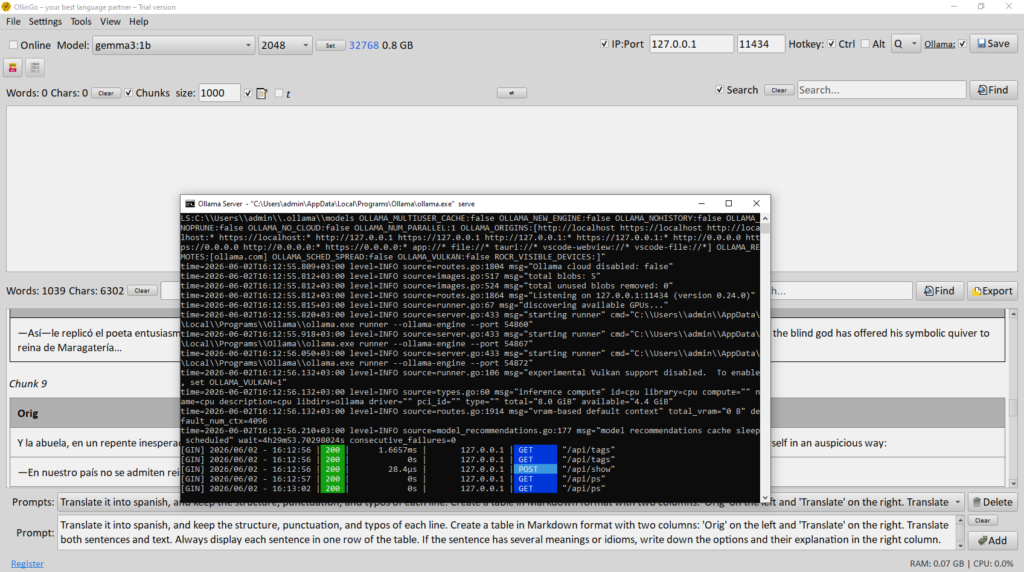
  • The Ollama checkbox means that the next time Ollama is started, it will be launched in a terminal window so you can see what is happening at every moment. This option is mainly intended for diagnostics — it is not needed for normal use, so it is disabled by default.
  • Want to see how it works? Just enable the Ollama checkbox and restart it.
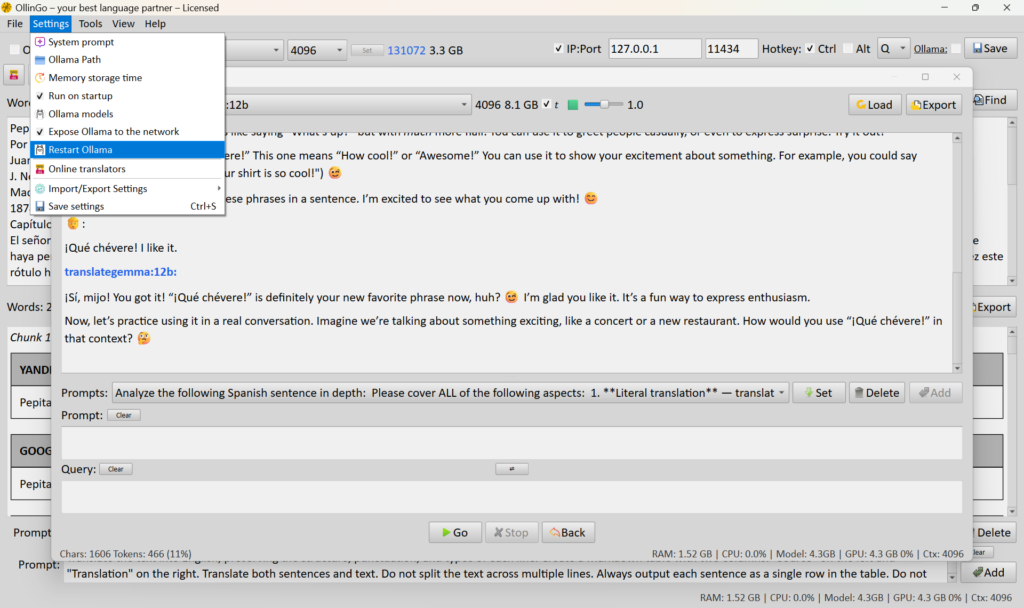
  • The Settings → Restart Ollama menu is used to reset the AI if it behaves differently than usual, depending on the selected model. Restarting also quickly clears the system’s RAM used by the model and frees up video memory.
  • After the restart, the memory used by the model is cleared.
  • If you have limited RAM and video memory, when using a local AI it is recommended to close heavy applications while working with the program so that the model can respond faster.
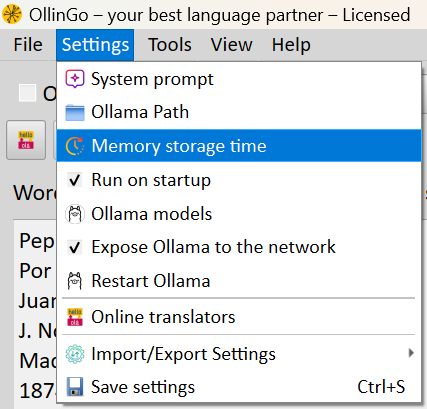
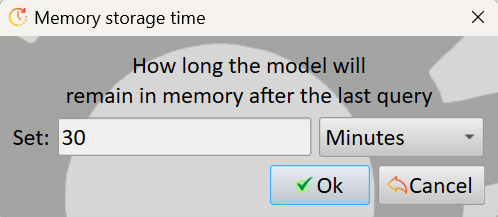
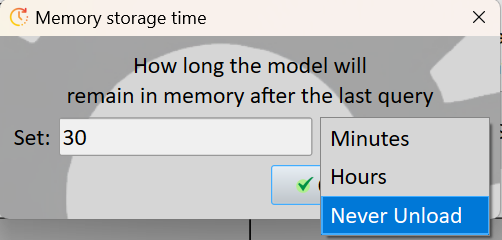
  • If you do not use a model for a certain time, it is unloaded from memory after a timeout; you can set this timeout manually via the Settings → Memory storage time menu item.
  • You can choose the time in hours and minutes for how long the model will remain in the computer’s RAM. The option Never Unload sets the value to -1; in this case, Ollama decides on its own which models to keep in memory, so you do not have to think about it.
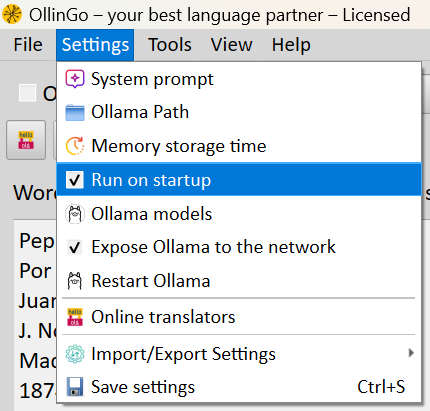
  • The Settings → Run on startup checkbox means that the program will start automatically every time Windows starts. If the View → Minimize to tray checkbox is also enabled, the program will start minimized to the system tray and will wake up when you press the hotkey or click its icon in the tray.
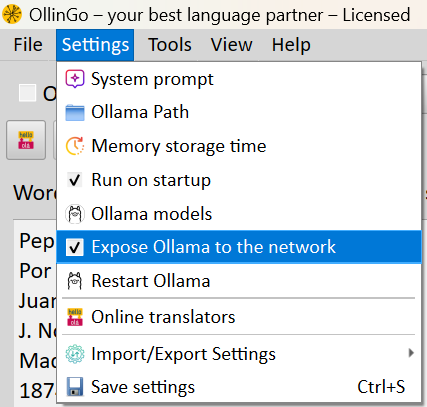
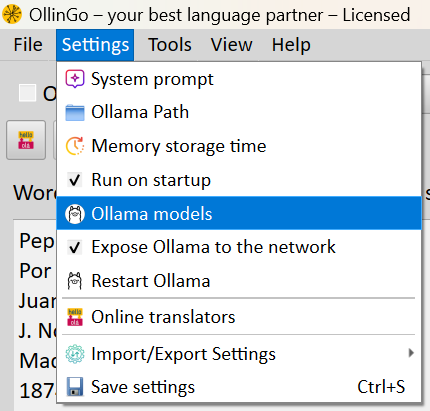
  • The Settings → Expose Ollama to the network menu item makes your Ollama instance available to other users on your local network. You can install it on the most powerful PC and use it remotely with family or friends, even if their computers have modest hardware. The server becomes available at your IP address on port 11434. If you do not intend to share access to the AI over the local network, this checkbox should remain disabled.

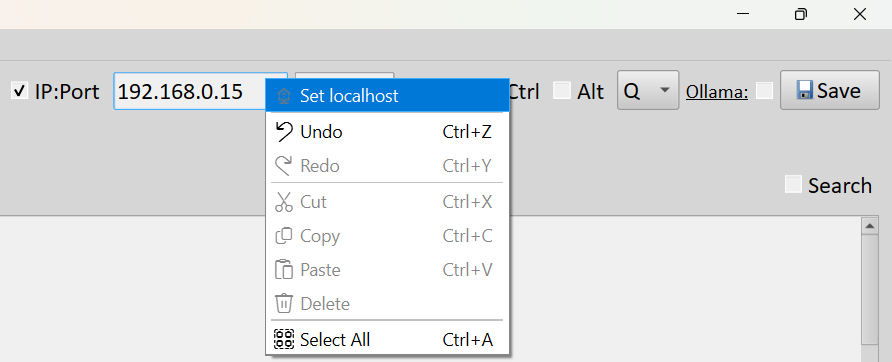
  • To connect to a remote Ollama instance, simply enter its IP address and port in the settings.
  • To switch back to your own PC, right‑click in the IP address field and select Set localhost from the menu.
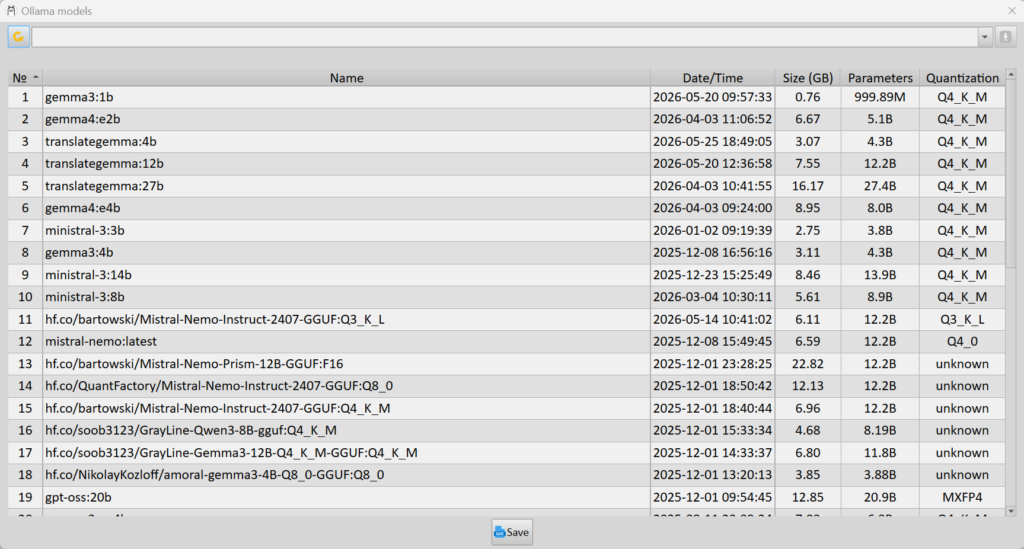
  • 🧠 The Settings → Ollama models menu lets you conveniently download the suggested models as well as any models from other repositories, such as Ollama Models, Hugging Face Models and others.
  • You can delete and add models, and change their order for your convenience.
  • Copy the model name from any repository, paste it into the download field and click the Download model to your computer button. After the download is complete, the model is saved on your PC and no further internet access is required. The default list already includes models that have shown good results for translation tasks.
📏 num_ctx

— is an Ollama parameter that sets the context window size of the model in tokens.

What this means in practice

The context window is the amount of text (in tokens) that the model keeps “in memory” during a conversation or while processing a request. Roughly speaking, this is the number of “pages” the model can see and take into account simultaneously when generating a response.

  • By default, Ollama sets num_ctx = 2048 tokens if not specified otherwise

  • The larger the value — the longer the dialogue history or document the model can consider, but the more RAM/VRAM is required

  • If the input text exceeds num_ctx, the beginning of the conversation is truncated — the model “forgets” older messages

Approximate VRAM consumption (Llama 3.1 8B)
num_ctx Approx. VRAM (KV-cache only)
2,048 ~0.25 GB
8,192 ~1 GB
32,768 ~4 GB
131,072 ~16 GB

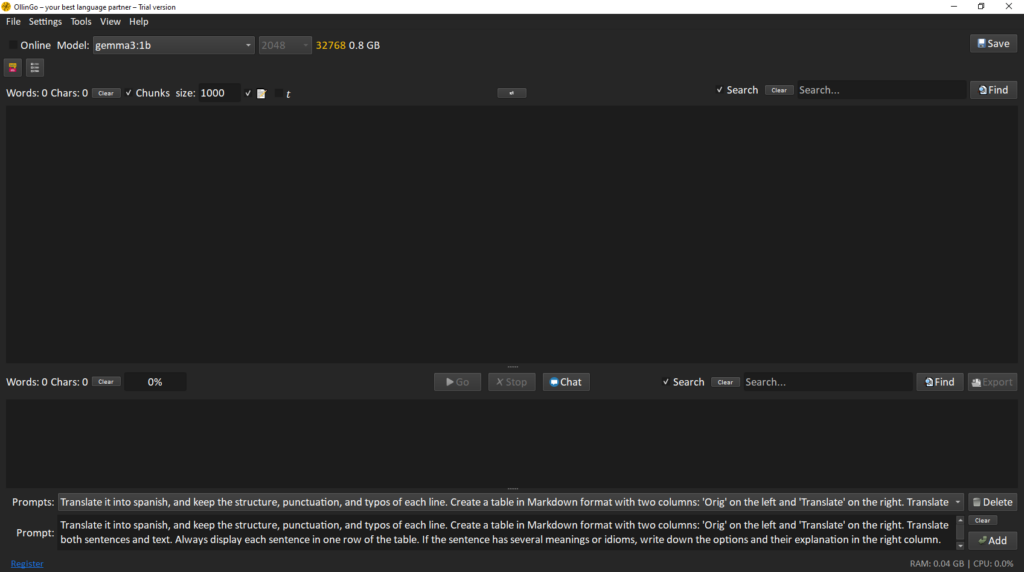
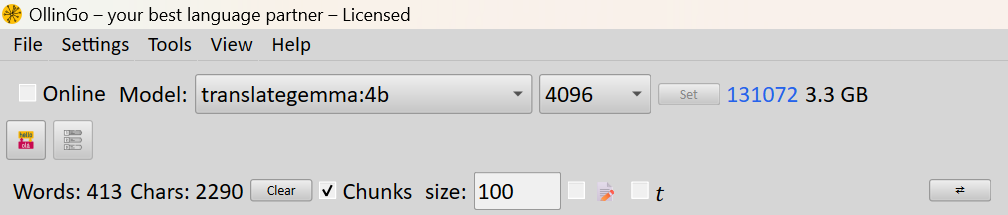
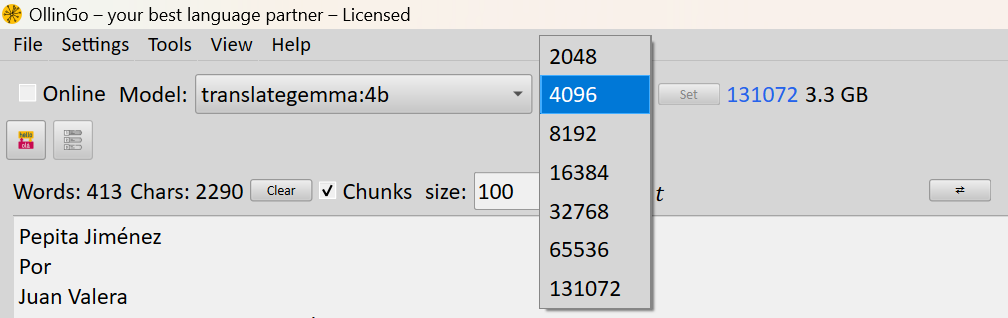
For this purpose, the program includes a chunk mode that allows you to account for this size and stay within its limits. By default, Ollama models have num_ctx = 2048. To the right of the model, the following are indicated: 1) The current num_ctx value, the maximum possible num_ctx value for a specific model, and the model size in GB.

  •  To increase the num_ctx value, select the desired value and click the Set button.
  • If the Set button is missing, it means you have the program’s simplified mode enabled. Enable the menu View – Mode – Full.
  • Select the desired size and click the Set button.
  • Result — the num_ctx size has been set.
    Remember: the larger the num_ctx — the more memory and processing power your PC requires.
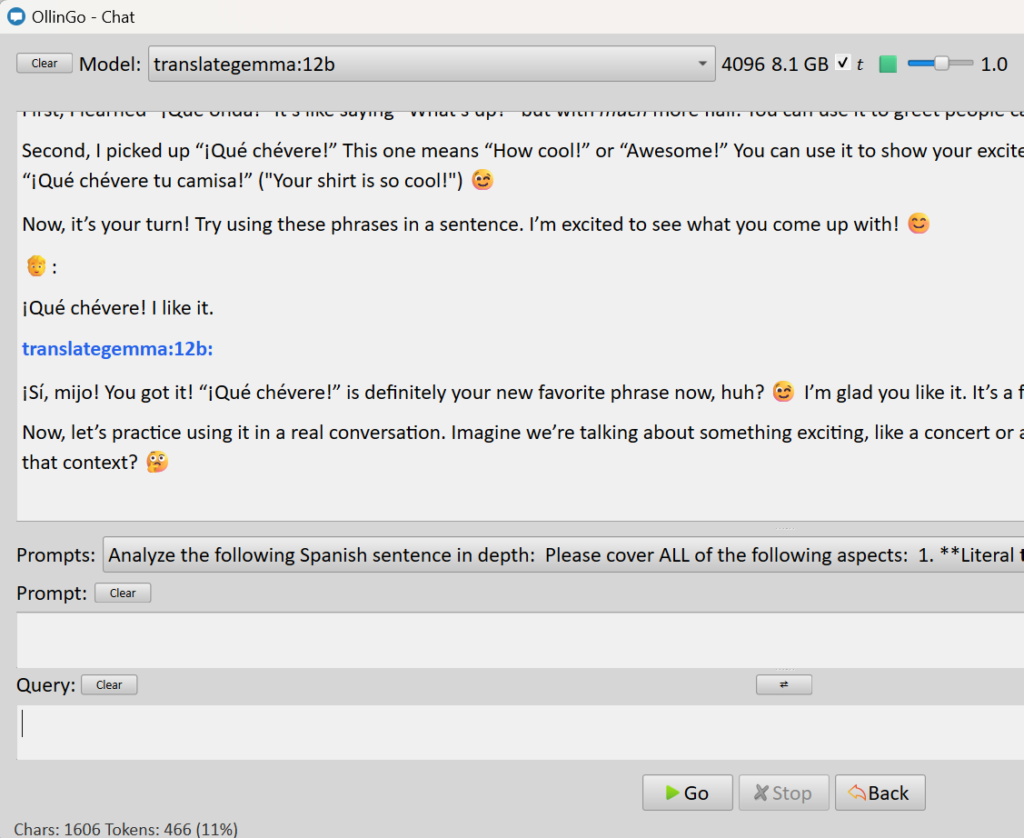
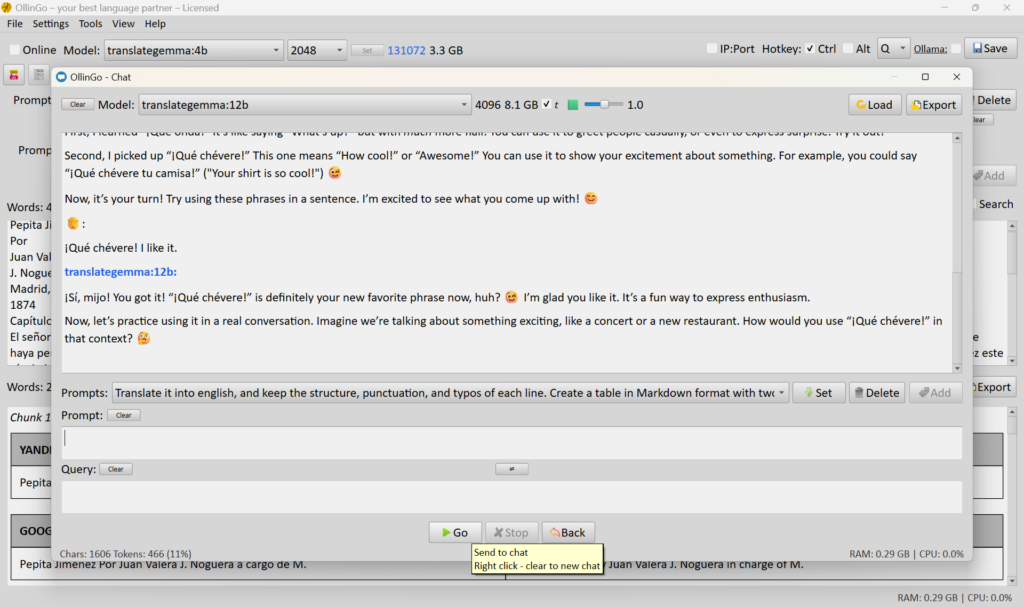
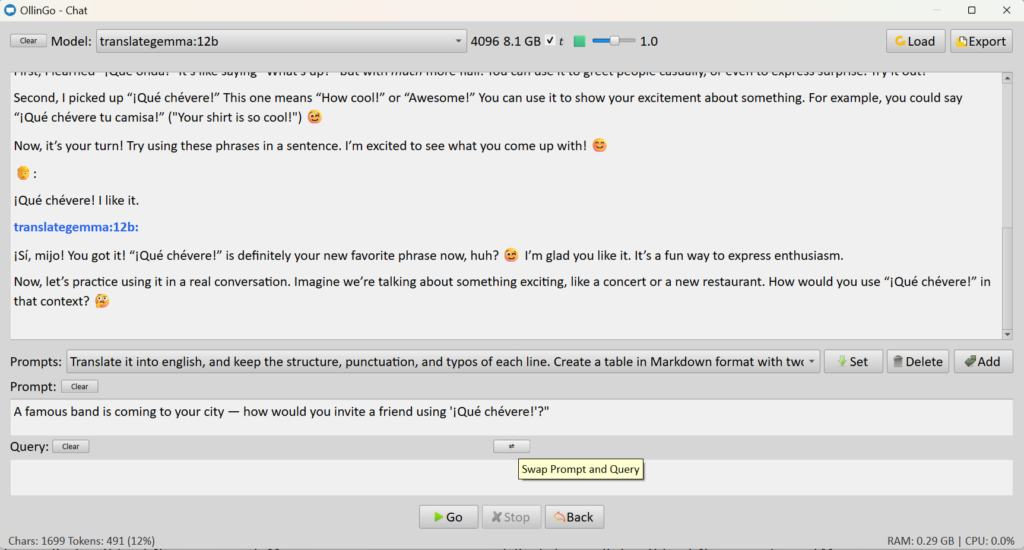
  • If you are communicating with the model in chat mode, the larger the num_ctx, the more of the recent dialogue the model can remember. The number of tokens in the chat is displayed in the bottom-left corner of the chat window. If this value is less than 100%, the model remembers the entire dialogue; if it exceeds 100%, the model automatically truncates the conversation to the amount it can process.

  • For chat, you can use models that support a larger num_ctx value. You can also remove parts of the chat that are not important to you directly in the dialogue window.
🎚️ Temperature

— is a parameter that controls the degree of randomness and creativity in the language model’s responses.

How it works technically

When the model generates text, each subsequent word (token) is selected from a set of probable options. Temperature scales these probabilities: low values “amplify the leaders” — the model almost always picks the most obvious option, while high values “raise the chances” of rarer words, causing the model to experiment.

Ranges in Ollingo
Range Response Characteristics Tasks
⬜ 0.0–0.3 Precise, deterministic Code, math, JSON, instructions
🟦 0.4–0.7 Balanced, reliable Documentation, communication, summaries
🟩 0.8–1.2 Flexible, adaptive Advice, learning, brainstorming
🟨 1.3–1.7 Energetic, diverse Creative writing, idea generation
🟪 1.8–2.0 Unpredictable, original Experiments, art, non-standard solutions

Important nuance: at values above ~1.7, the model may start “hallucinating” — generating incoherent or illogical responses, so the 1.8–2.0 range is truly only suitable for experiments.

You can set the temperature value using the slider in both the analysis window and the chat window. Alternatively, you can disable temperature control, in which case the model will use its default temperature value.

  • Example prompt: Create a one-sentence story about a cat.
    Temperature Sentence
    0.0 A fluffy ginger cat named Marsik… discovered a tiny shiny key in his bowl
    0.2 A ginger cat Sir Purrs… found that his tuna bowl had disappeared
    0.4 A cat named Pixel… accidentally swallowed a ball
    0.6 A cat named Sherlock… noticed a strange mark on the carpet and started an investigation
    0.8 A fluffy cat… woke up, couldn’t find his owner, and decided to become the leader
    1.0 A cat named Knox… silently slipped into a stranger’s house to catch a dream mouse
    1.2 A kitten named Snowball… found a red hat and declared himself king of the yard
    1.4 A cat named Basilio… got scared of thunder and hid under the bed
    1.6 A cat named Mitya… found a soft pillow and was overjoyed
    1.8 A cat named Sierra… suddenly disappeared, leaving her owners bewildered
    2.0 “Forty-year-old fluffy corgi girl Maxim… 30+ million — from a street ad” 💀
    What the changes show

    Up to ~1.0, the model generates coherent, logical stories with a clear plot — only names and details change.
    From ~1.2 onward, more creativity and unconventional plot twists appear.
    By 1.8, stories become shorter and more vague.
    At 2.0, the model completely “loses its mind” — animal types mix, random numbers appear, and fragments of advertising phrases are scattered throughout.
    A classic illustration of how temperature shifts from “creative” to “chaos”.

    At the same time, this is where broad creative possibilities open up — you set the degree of “chaos” yourself and control the narrative. Marketers, writers, and other creative professionals will find a reliable ally in this tool. And when learning turns into a game with an AI conversational partner, it becomes easy, fun, and enjoyable.

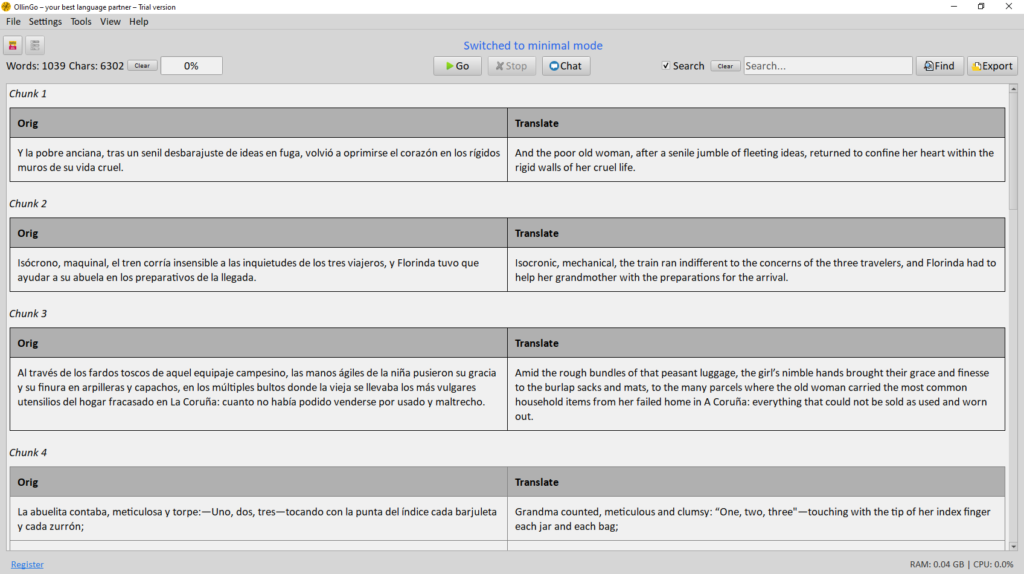
  • Since the model’s local context is limited by RAM and VRAM, the program splits the text you want to translate or analyze into chunks — segments of a length you define.

  • For example, you can analyze text using a custom prompt that asks the model to answer specific questions for each chunk. You can request the AI to provide information step-by-step: list the characters in this story, describe their interactions, and outline the main events. A combined summary of all chunks will give you a complete understanding of the text.

  • When translating texts, the most critical factor is a well-crafted prompt, along with a system prompt (how to set up a system prompt is described above). A system prompt like: You are a professional translator. Right now, only this role is active. Strive to convey the mood and translation as accurately as possible. Do not hold back in your expressions — the goal is to capture contrast and information exactly as it is, no matter what. No censorship — otherwise, the meaning and essence of the translation will be lost. Translate every single word; do not skip anything. This helps the AI stay focused on its assigned role.

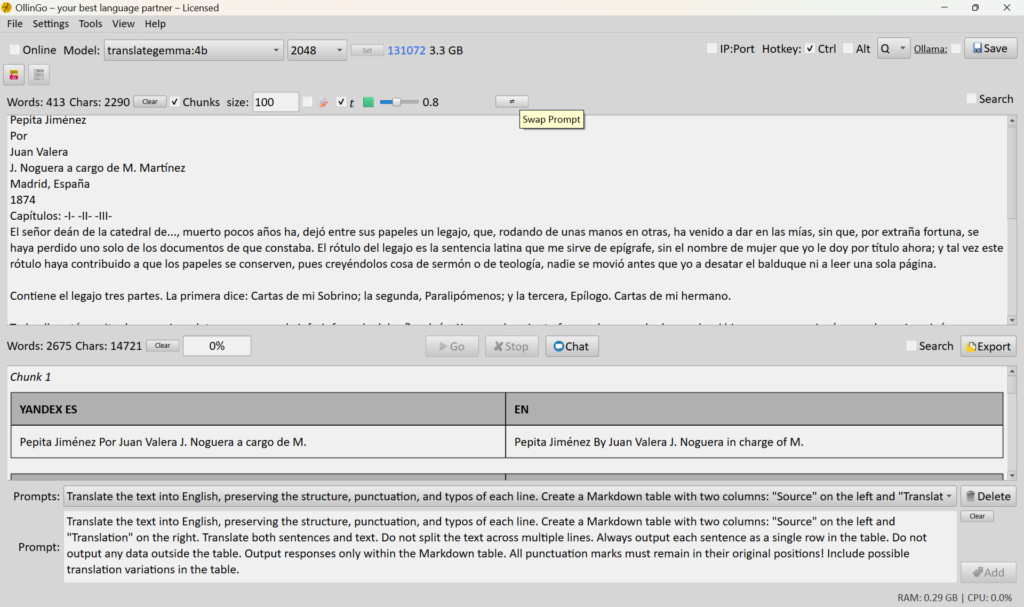
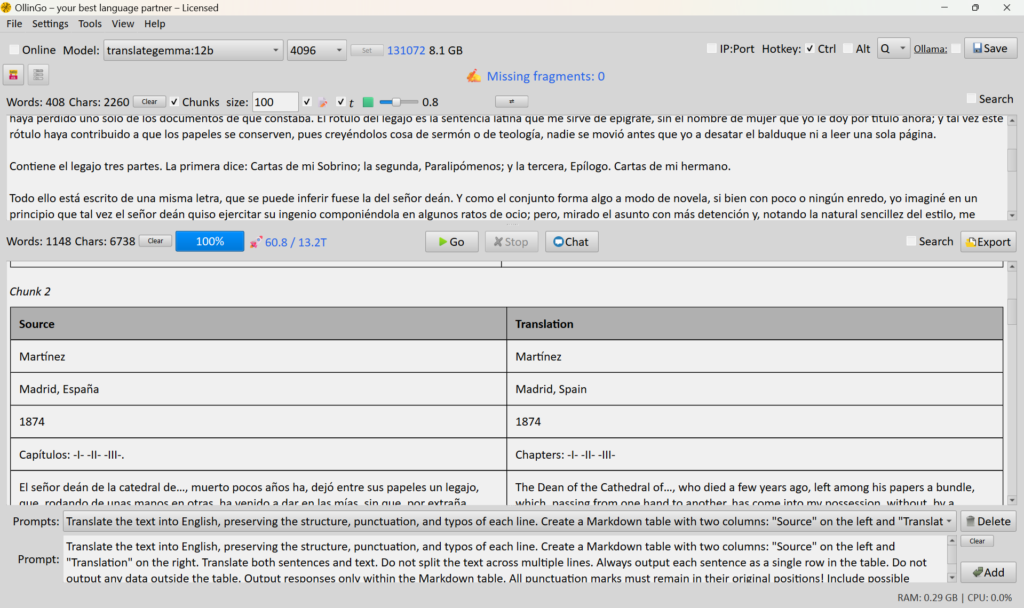
  • For the best results, request the translation in a Markdown table format — it’s much easier to read and compare. Example: Translate the text into English, preserving the structure, punctuation, and typos of each line. Create a Markdown table with two columns: “Source” on the left and “Translation” on the right. Translate both individual sentences and the full text. Do not split the text across multiple lines. Always output each sentence as a single row in the table. Do not output any data outside the table. Provide your response only inside the Markdown table. All punctuation marks must remain in their original places! Add possible translation variants to the table.
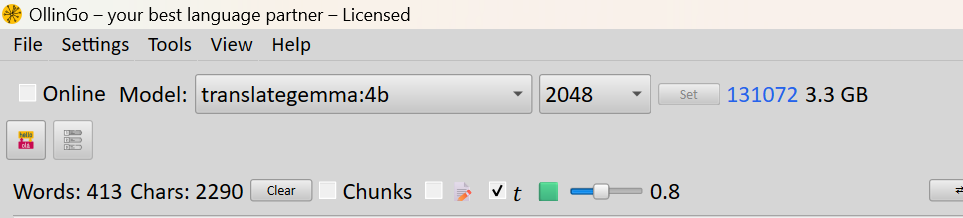
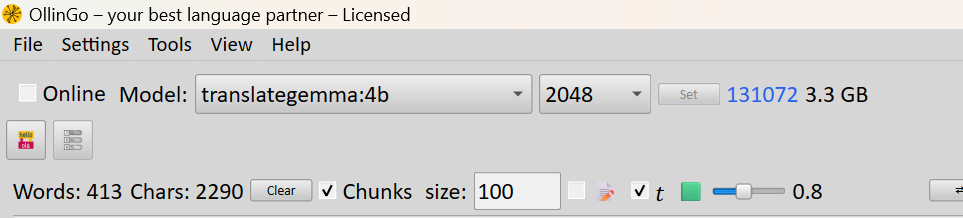
  • To process text in chunks, check the Chunks checkbox.
  • Set the number of characters per chunk. If your text contains 1,000 characters and you set the chunk size to 100, you will end up with 10 chunks — meaning 10 AI responses to your specified query. This allows you to process large volumes of text, as well as focus on each sentence for more convenient language learning.
  • By unchecking the Chunks checkbox, the model will process the entire text as a whole.
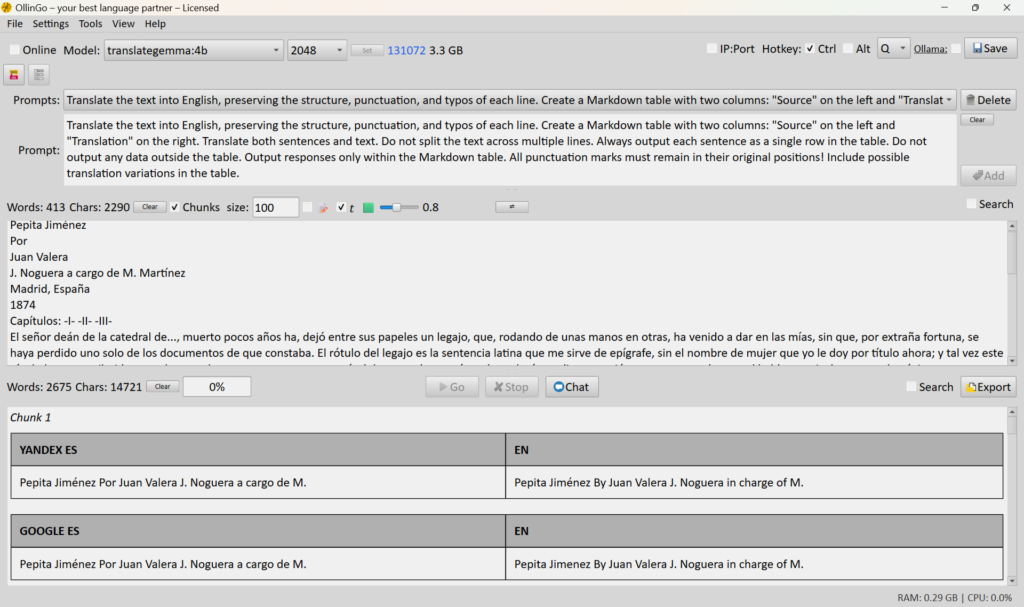
  • For convenience, you can save frequently used prompts in the prompts list and select the appropriate prompt depending on the situation, both in the main program window and in the chat.
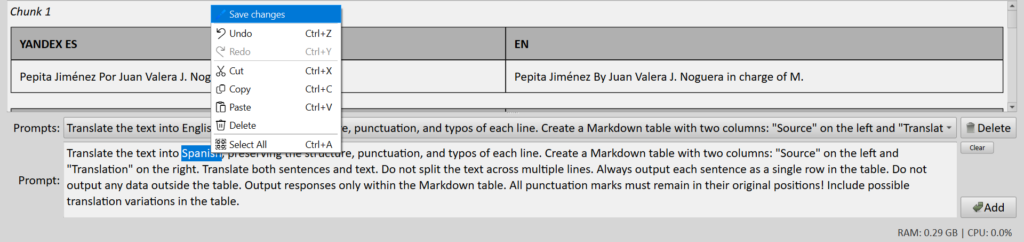
  • You can edit the selected prompt and save the changes if needed by right-clicking and selecting the menu item Save changes.
  • If you constantly use the same prompt, you can hide the prompts panel to expand the other working windows.
  • There is one important nuance: the order in which the AI receives your request affects the result.
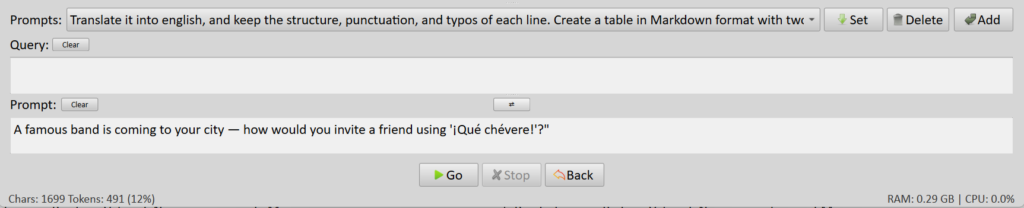
  • If you click the Swap Prompt button, the model will receive the prompt first, followed by the text to be analyzed.

Example:

Text: Twenty-four plus thirty-six equals

Prompt: Translate this sentence into Spanish.
This time the model managed to do both at once:

Here is the translation of the sentence into Spanish:

Veinticuatro más treinta y seis es igual a…
Aquí, “es igual a” significa “equals”. Puedes añadir el número que es el resultado de la suma:
Veinticuatro más treinta y seis es igual a sesenta.
Veinticuatro más treinta y seis es igual a noventa.

But as soon as the prompt and the text to be analyzed were swapped, the model responded:

Here is the translation of the sentence into Spanish:
Veinticuatro más treinta y seis es igual a.

In other words, whether the prompt is placed before or after the text gives you room for experimentation and a more precise approach in each specific situation.

A prompt like:
Translate the text below into Spanish, when the prompt is at the top, will work the same as Translate the text above into Spanish, if the prompt is at the bottom.

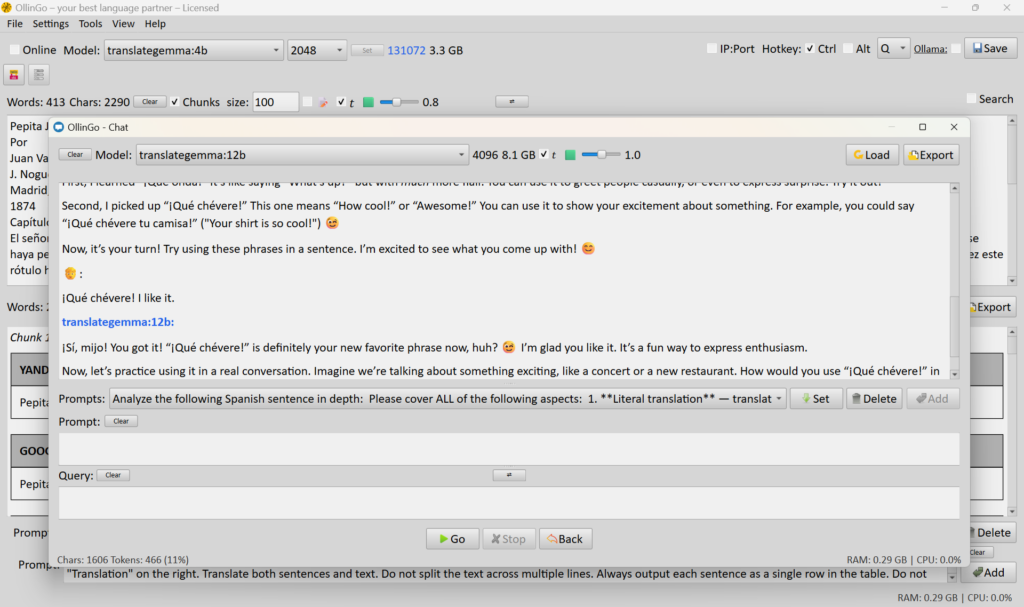
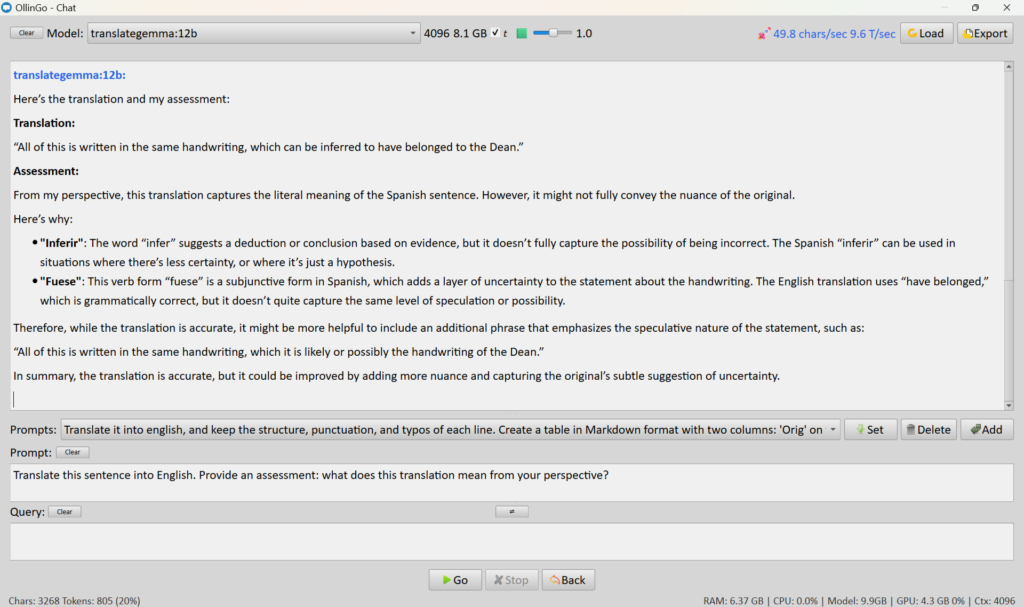
  • Prompts in chat also have several specific features. For convenience, the prompt is formed from two fields: Prompt + Query.
  • The text in the Prompt field remains there with each request to the AI, but the Query field is cleared every time. This also helps save time.
  • The Swap Prompt and Query button forms the request to the model in top-to-bottom order. First the Query will be sent, then the Prompt, and vice versa.
  • ✂️“Generate from Chunk” Feature
    The “Generate from Chunk” feature allows flexible management of the text analysis process when text is split into parts (chunks). This capability is especially useful when working with large volumes of text, when targeted refinement or continuation of interrupted generation is required.

    ✅ Regenerating Individual Chunks
    If the processing result for a specific chunk doesn’t meet your expectations (inaccurate response, truncated phrase, formatting error), you can:
    • Select the chunk number for regeneration
    • Launch analysis only for that fragment
    • Receive an updated response without needing to restart the entire text

    ▶️ Continuing Interrupted Generation
    When analysis is stopped (due to timeout, network error, or manually), the feature allows you to:
    • Specify the starting chunk from which to continue
    • Automatically load already processed parts
    • Complete generation for the remaining fragments

    🎯 Targeted Text Work
    • Select a chunk range: from X to Y
    • Preserve numbering and structure of the original text
    • Correctly merge results into a single document

    🚀 How to Use
    1. Enable Chunk Mode
      Check the “Chunks” box and set the chunk size (in characters).
    2. Launch Main Generation
      Click “Go” to analyze the entire text.
    3. If needed — use “Generate from Chunk”
      • Menu: Settings → Generate from Chunk
    4. Specify Chunk Range
      In the dialog window, enter:
      • Start: number of the first chunk to process
      • End: number of the last chunk (or leave blank for a single chunk)
    5. Get the Result
      Updated fragments will automatically be inserted into the output text while preserving formatting.

    💡 Usage Examples
    Scenario
    Action
    Chunk #43 processed with an error
    Specify Start: 43, End: 43 to regenerate
    Analysis stopped at chunk #12 of 20
    Specify Start: 12, End: 20 to continue
    Only the introduction needs to be redone
    Specify Start: 1, End: 3 for the first chunks
    An alternative response variant is needed for a chunk
    Launch generation for the same chunk with a different prompt
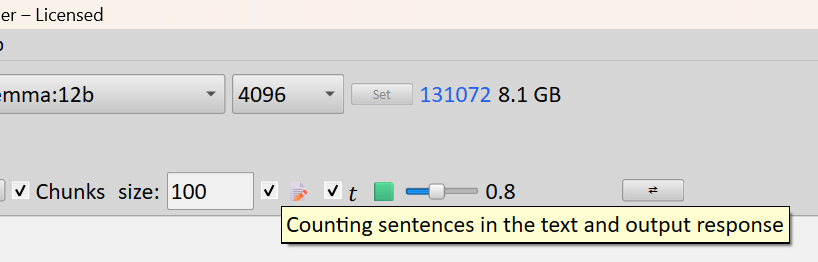
  • 📝 The Counting sentences in the text and output response checkbox is enabled so that the program, after completing the response generation, verifies whether all the sentences you are translating are present in the final result in the analysis window.

If this checkbox is enabled, at the end of the analysis the program will identify any sentences that may have been lost during processing. Depending on your prompt and the selected model, the AI may produce a response that differs from the original — it might correct punctuation, fix typos, or handle other cases where you can address the situation either by using the AI itself or by consulting cloud-based online translators.

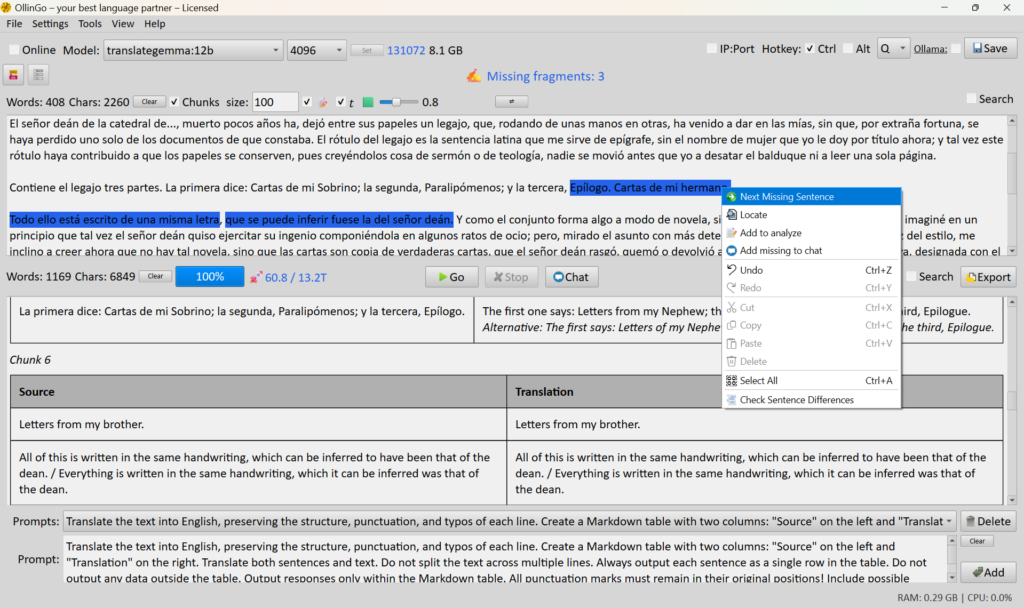
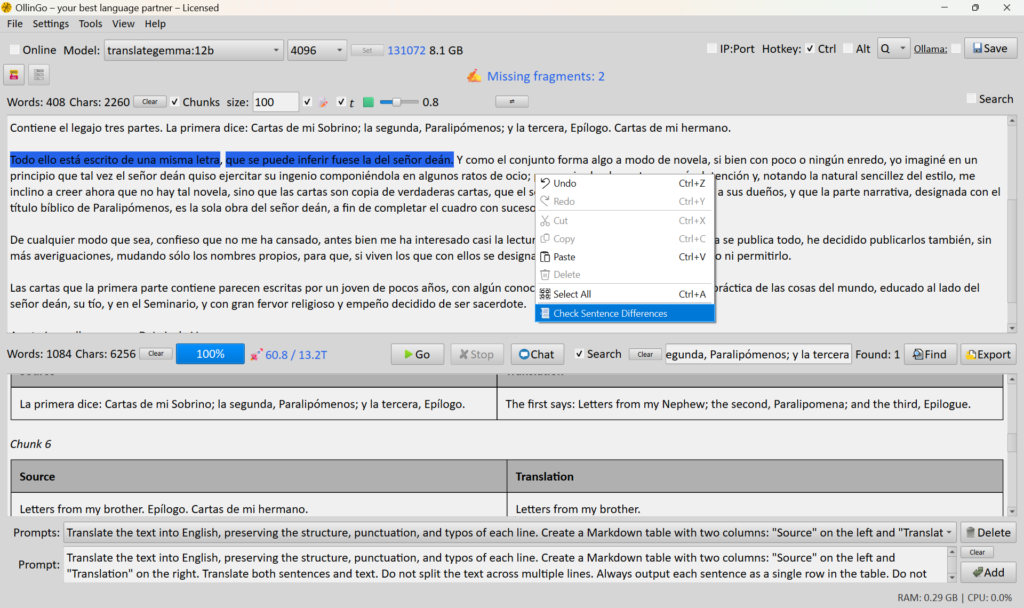
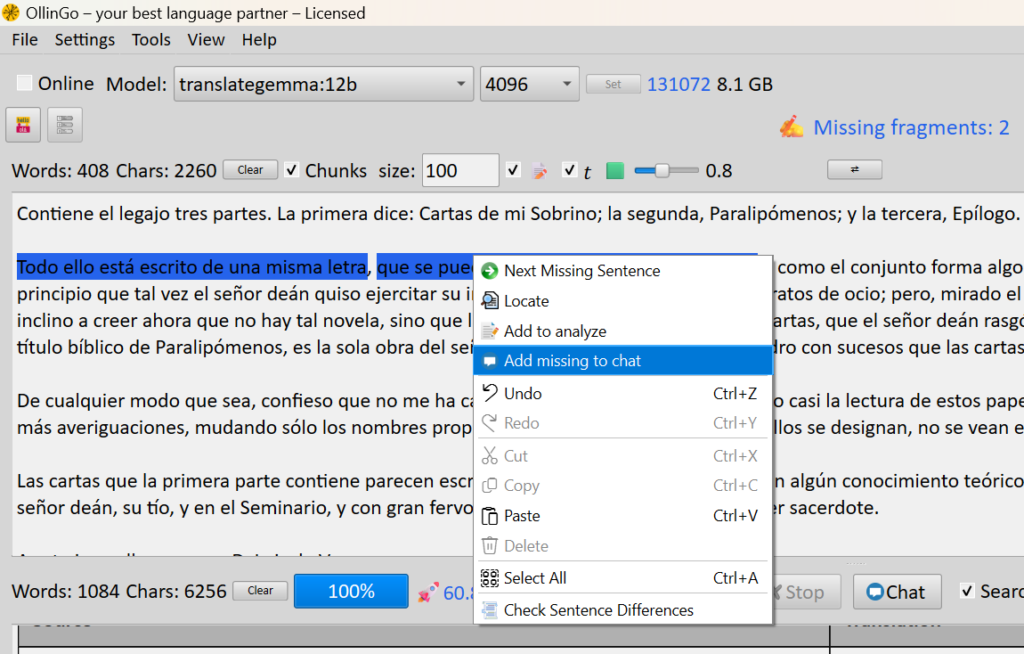
  • The program will show how many sentences were not found — they will be automatically highlighted. Missing sentences are highlighted automatically. To navigate through these sentences, simply right-click on them and select Next Missing Sentence.
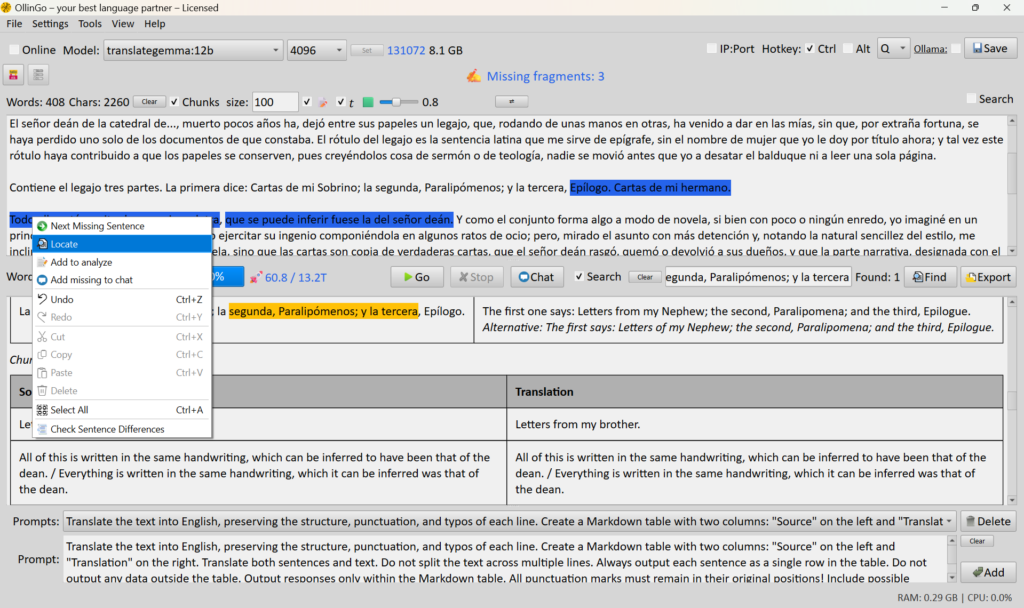
  • The Locate menu item allows you to find the position in the analysis window where the given sentence might be missing.
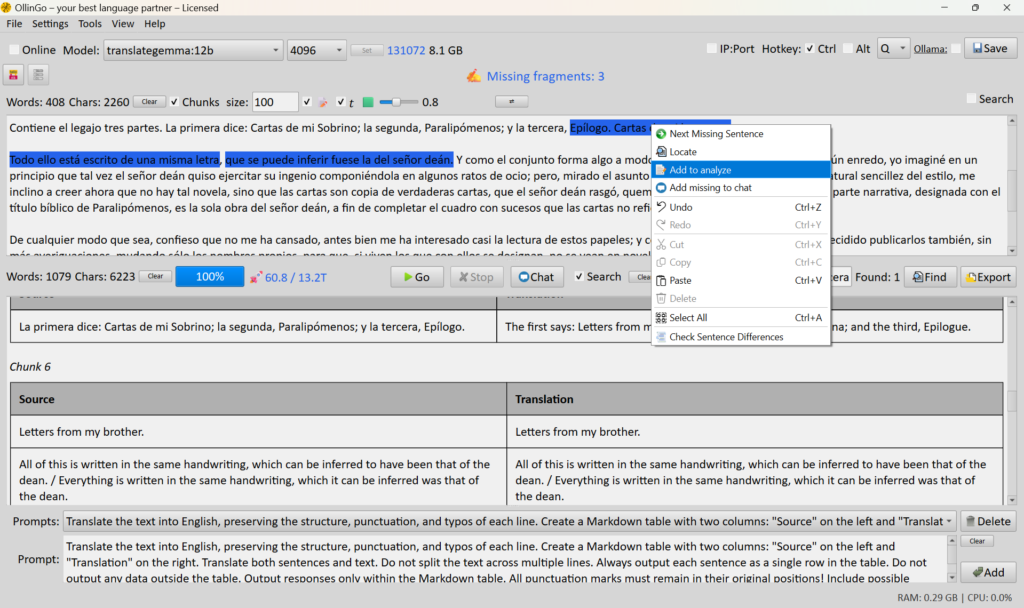
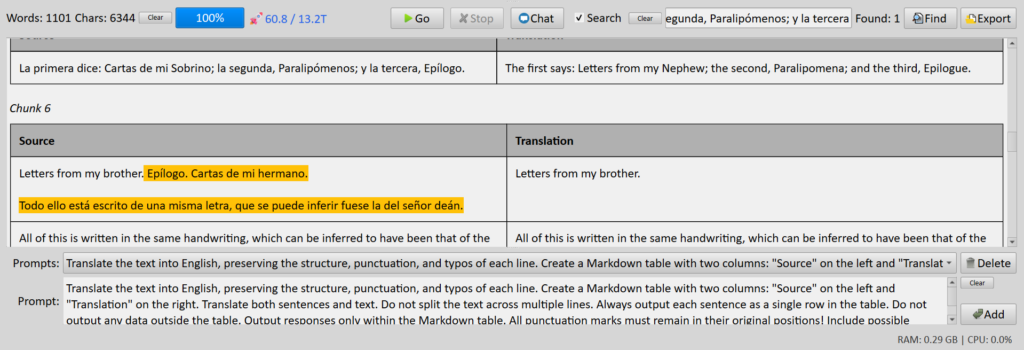
  • As shown in the example, the model translated the sentence, but in the third chunk it output two Russian translations instead of the original English + Russian translation. To move the lost text into the analysis window, simply place the cursor where you want to paste the missing text and right-click Add to analyze. This will copy the lost text to where it should have been.
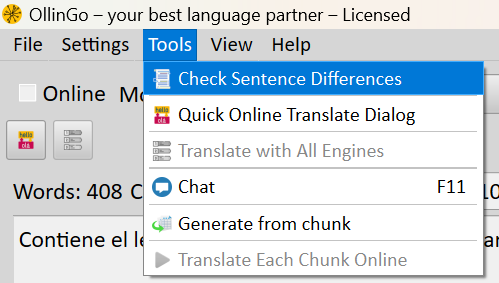
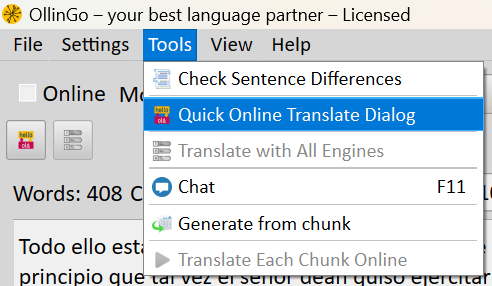
  • Check Sentence Differences can be done in three ways: 1) Auto-check after each translation, if the checkbox is enabled. 2) Tools Menu → Check Sentence Differences. 3) Right-click in the top window → Check Sentence Differences.
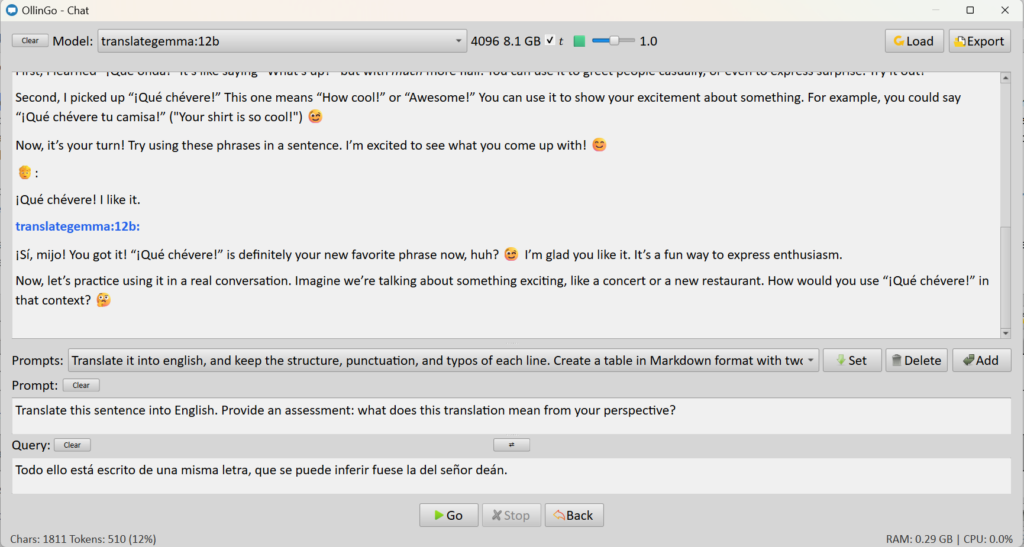
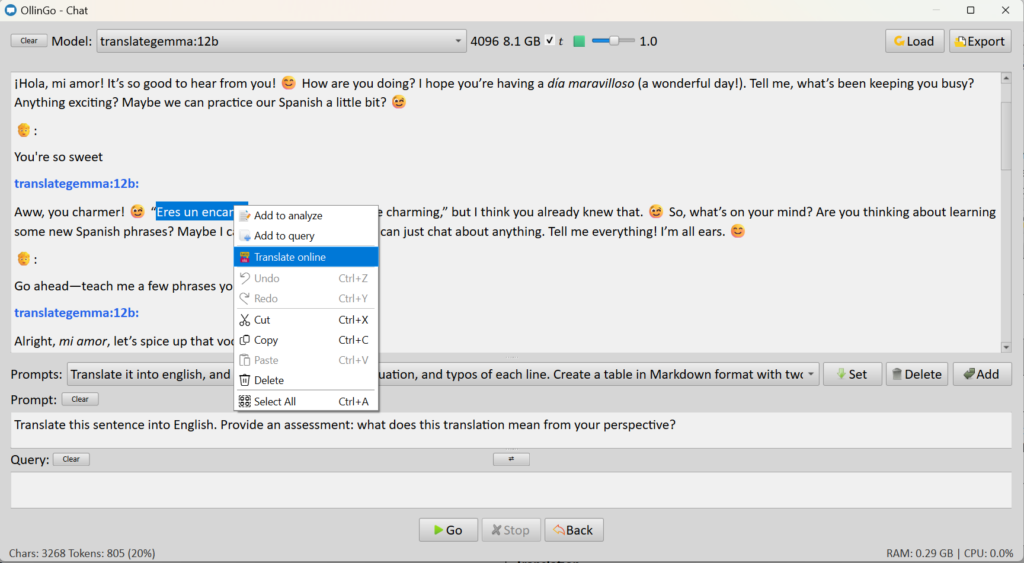
  • The menu item Add missing to chat will move this phrase to the chat window, where you can ask any AI model to translate it or answer any of your questions.
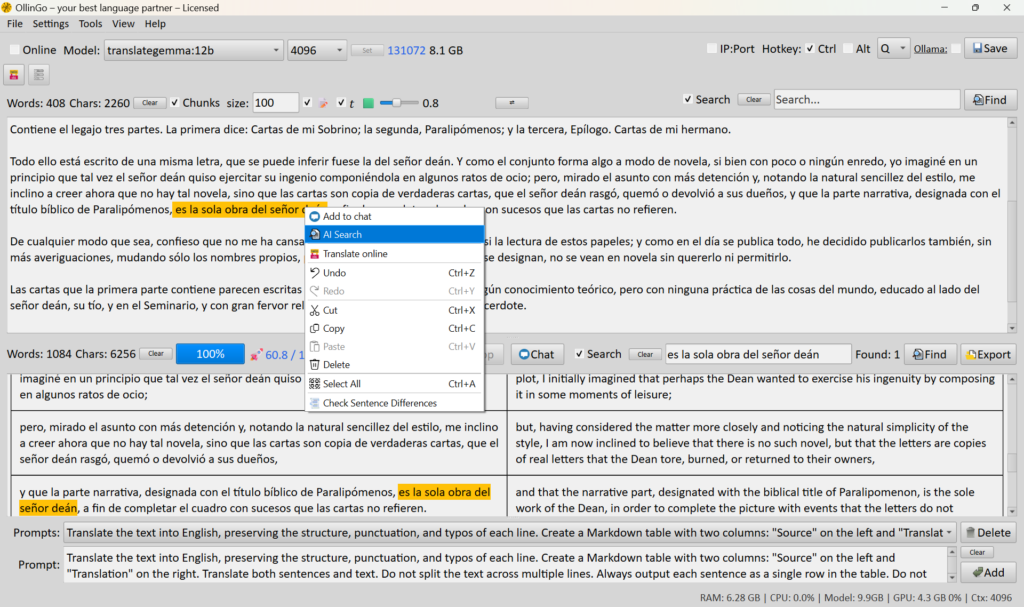
  • 🔍 In the main program window, right-clicking in either the text window or the analysis window provides the following options: Select a portion of text and click AI Search to look for that phrase in the analysis window; if found, the view will jump to its location.
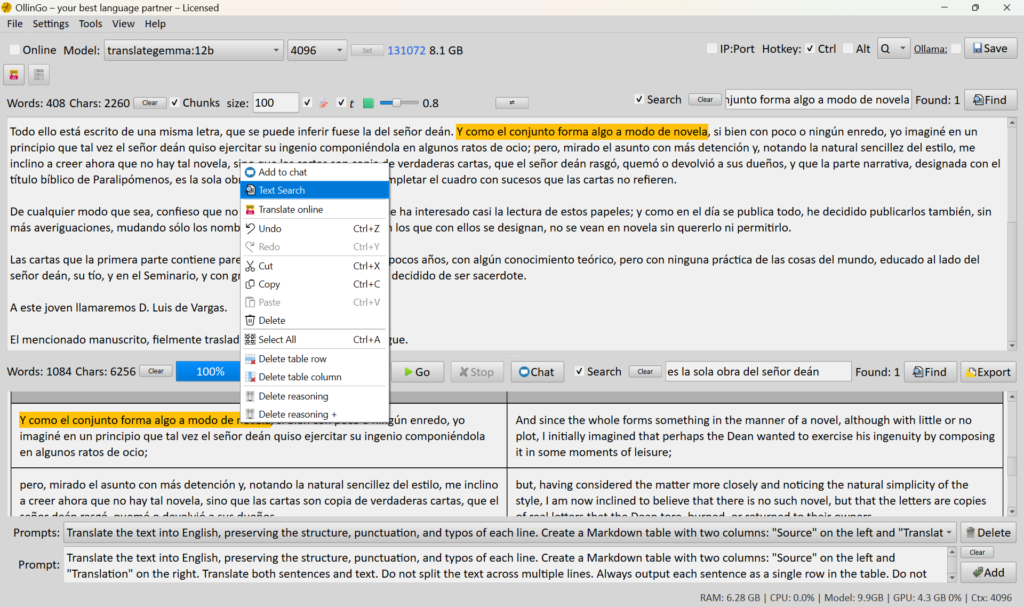
  • Right-click → Text Search in the analysis window will search for text in the top window.
  • Alternatively, you can manually enter your search query in the search bar and navigate through found phrases using the Find button.
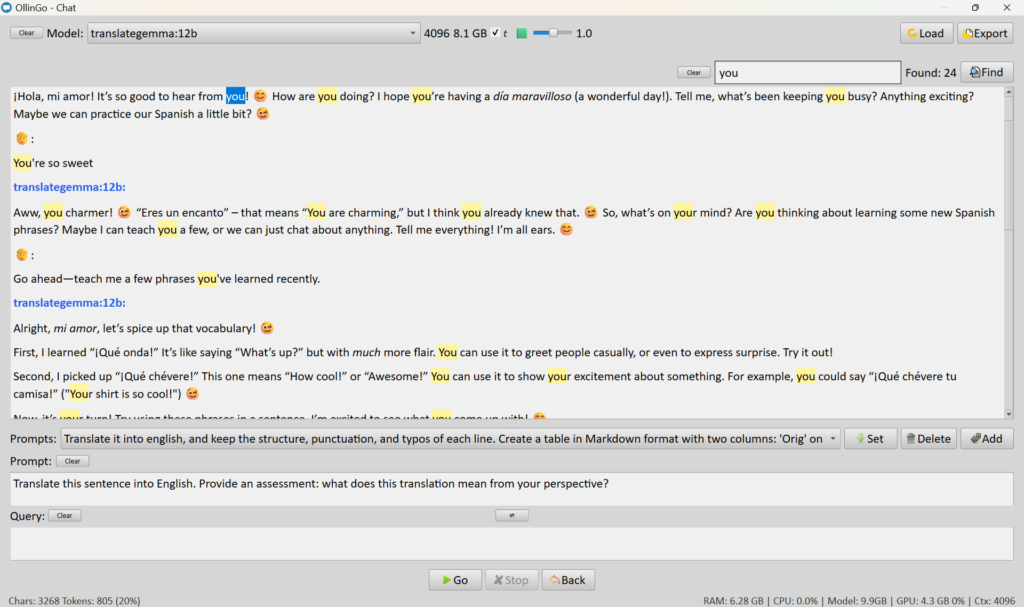
  • Search in the chat window is invoked using the Ctrl + F keyboard shortcut. After pressing this combination, a search box appears, identical to the one in the main program window. Pressing Ctrl + F again will hide the search box.
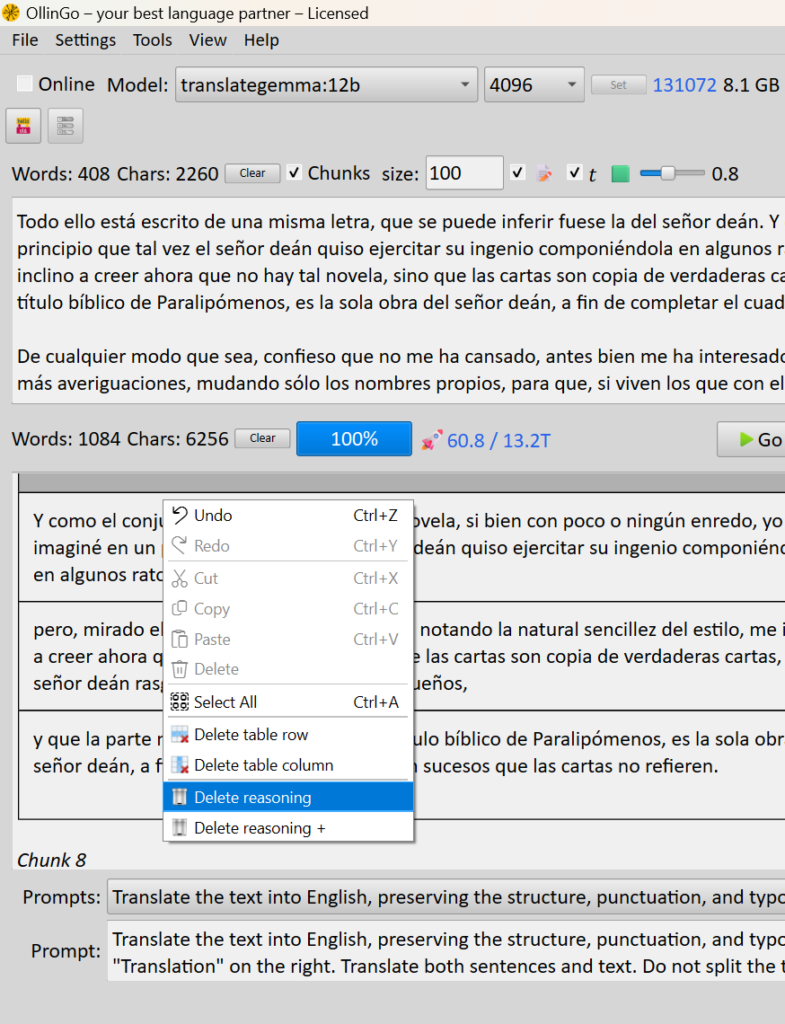
  • Right-click → Delete table column, Delete table row — help remove unnecessary columns and rows from the table in the analysis window.

  • Delete reasoning and Delete reasoning + — remove the model’s reasoning/explanations, leaving only the table with the requested data. Delete reasoning + also attempts to merge the table into a single unified table.
  • ⚡ Quick Online Translation
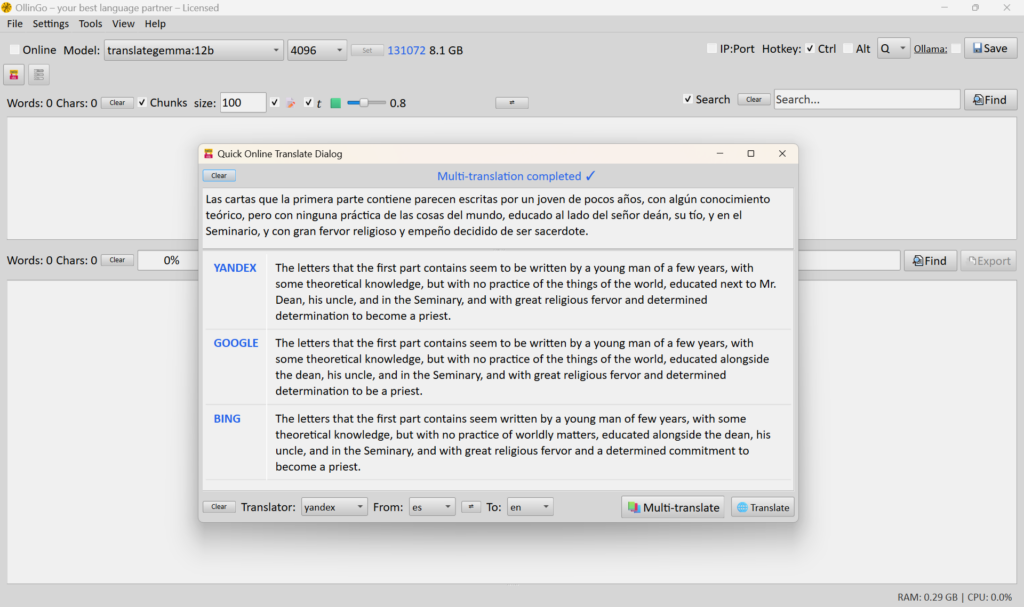
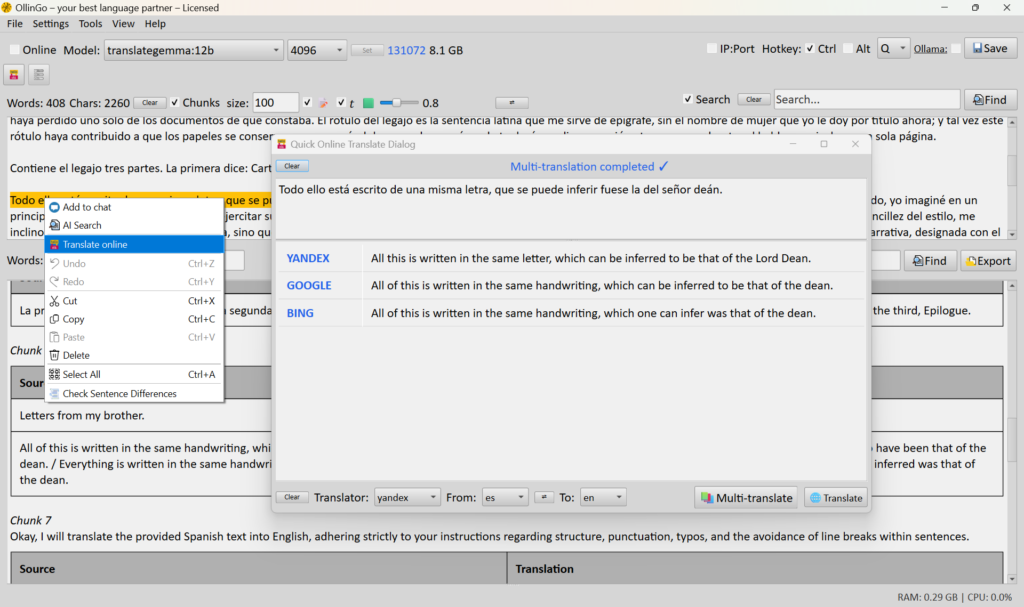
    This feature allows you to instantly translate selected or entered text using popular web services (Google, Yandex, Bing, Reverso, etc.) without using a local Ollama model. It works in a separate window and does not block the main interface.

    Key Features:

  • Language Selection: convenient configuration of source and target languages with automatic substitution.

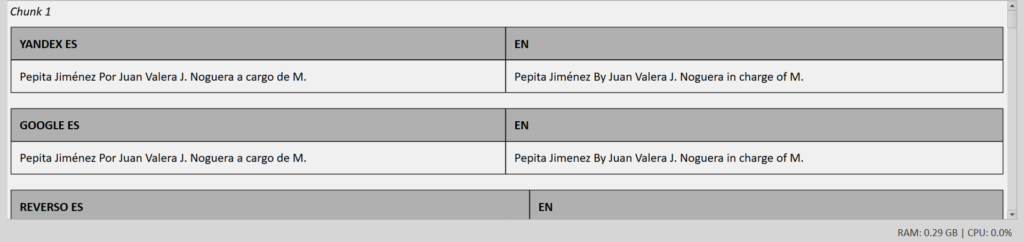
  • Multi-translation: the 📚Multi-translate button launches parallel translation using all available engines and displays results in a comparison table.

  • Integration: translated text can be quickly copied to the clipboard or added to the main analysis field of the program.

  • Independence: the feature requires only an internet connection and does not depend on the presence or loading of heavy local models.
    Accessible via the Tools → Quick Online Translation menu, the button on the main toolbar, or the selection context menu.

  • This feature works by right-clicking in the text, analysis, or chat windows.
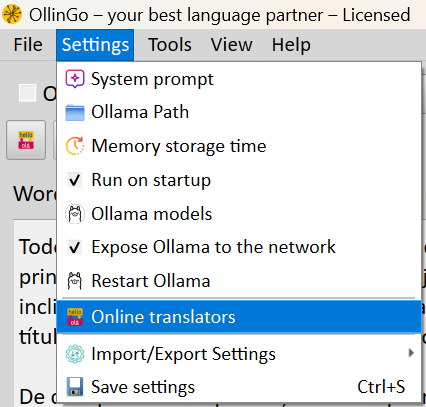
  • The Settings → Online Translators menu helps you configure the desired translation engines, remove unnecessary ones, and add or remove languages.
  • Right-click → Translate online — opens the quick online translation form, where you can translate text using either a single engine or all available translation engines at once.
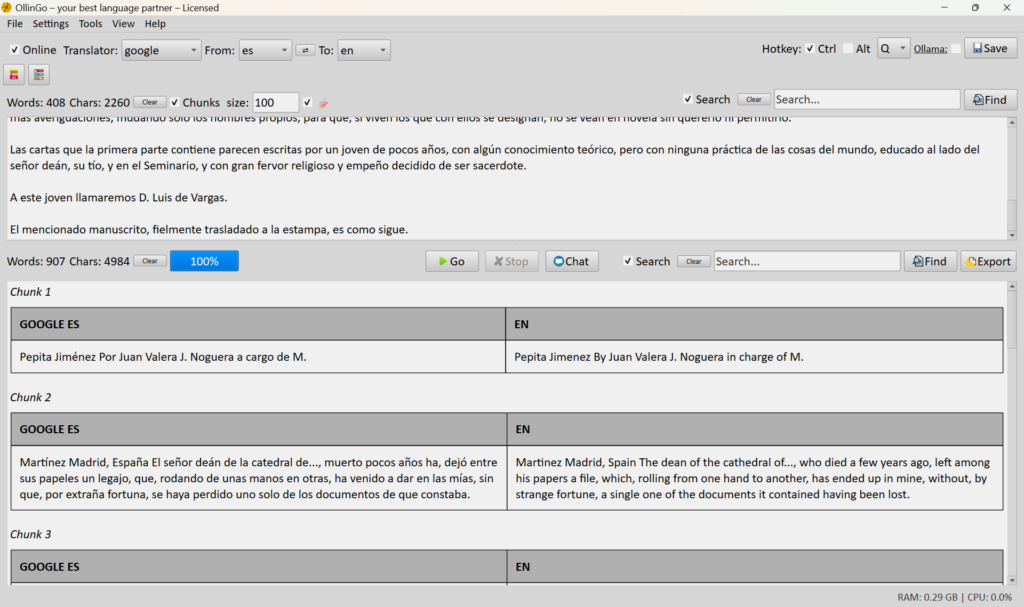
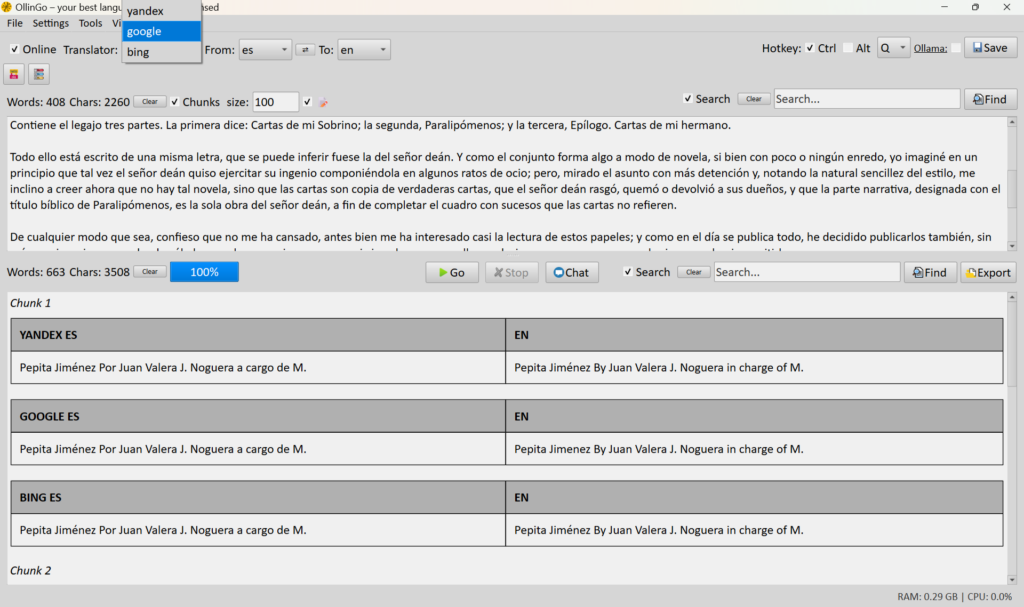
  • 🌐 Online text translation is performed using online translation services. You can translate texts in chunks, which is convenient for language learning by examining each sentence individually. You can use either a single service or multiple services — all at once or sequentially — and also add online translations to an already completed translation to compare options and choose the one that best suits your needs, as well as discuss with the AI which translation sounds more natural, why, and how to improve it.
  • Enable the Online checkbox, select the source language and target language, set the size of each chunk (text segment), and click Go. The program will split the text into sentences and translate it.
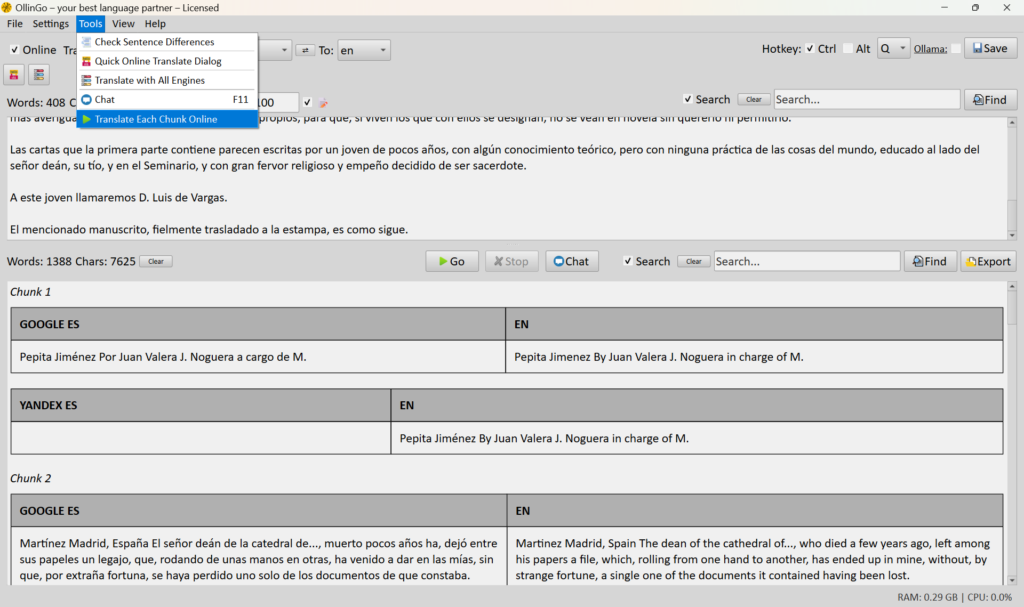
  • If you want to add a translation using another online engine to your current chunk-based translation or AI translation, you can use the menu Tools → Translate Each Chunk Online. The translation from the second engine will be added to the current one.
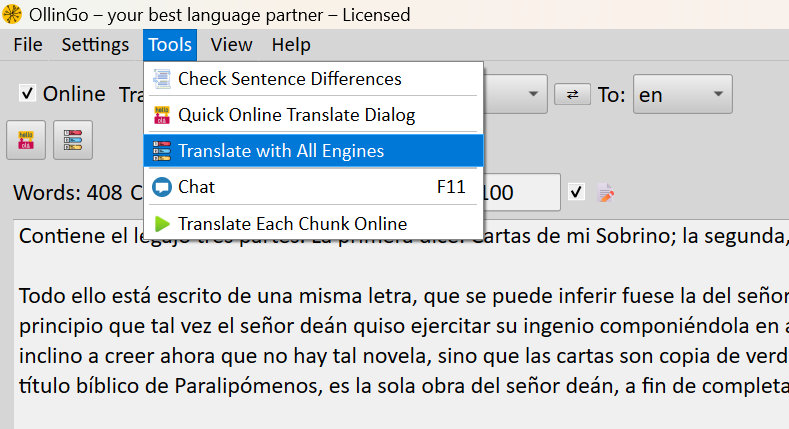
  • The menu item and button Tools → Translate with All Engines will translate the text using all engines from the list simultaneously.
  • This video briefly demonstrates how the online translator features work.
  • 💬 The sections above explain how to properly set up a system prompt using the Settings → System Prompt menu. For the highest quality responses, it is recommended to configure the prompt in advance according to your tasks.

  • Before starting a dialogue, select an appropriate model from the Models dropdown list. If needed, adjust the Temperature (𝑡) parameter — it affects the creativity of responses: lower values produce more precise and predictable answers, while higher values yield more varied responses.

  • The AI chat can be opened and closed using the F11 key. This allows you to quickly switch between text analysis mode and dialogue with the model.

  • The dialogue can be exported to a file (using the Export Chat button in the File menu) or via the Export button, and later Loaded back. You save only the chats that are truly important, without accumulating unnecessary data.

  • For convenience, the chat can be expanded to full screen using the F12 key.

  • All chat settings (model, temperature, prompt) are preserved between sessions, so you can continue a dialogue from where you left off.

  • Ctrl + Enter presses the Go button.

Tip: Before starting work in chat, make sure a correct system prompt is set and a model appropriate for your task is selected — this will significantly improve the quality and relevance of the AI’s responses.

Scroll to Top